What's New Here?

Showing posts with label How to.... Show all posts

How to make the perfect boiled egg?


I have met a lot of hardboiled eggs in my time, but you're twenty minutes.” OSCAR WILDE

Before you scoff at me for writing this post - a properly boiled egg with a little sprinkle of salt and pepper is one of the simple joys of life and equally easy to mess up. Had with toast, or just by itself as a mid-day snack, or in your kid's lunch box, it's wholesome, easy and hardly takes any special effort. 

My earlier method of boiling an egg was to place it in a pan full of water and boil the hell out of it for 10 odd minutes, drain and peel. While this works well, the egg sometimes turns rubbery and the unpleasant grey sulphur ring inside that makes it so unpalatable.

The full credit for my current technique goes to Mark Bittman and his book 'How To Cook Everything Vegetarian'.


So here are my tips on getting the perfect boiled egg

  1. Buy the best quality eggs you can get.
  2. It helps if the eggs are not utterly fresh. A few day old eggs are so much easier to peel off than fresh eggs.
  3. Place the eggs in a deep pan. Cover them with tap water.
  4. Place this on the stove. 
  5. Bring the water to boil.
  6. They say swishing the water in the pan in circles helps center the yolks, in case you plan on making deviled eggs.
  7. Once the water comes to a rolling boil, turn off the flame. Cover with a fitting lid and let it sit for 10 minutes.
  8. After 10 minutes, remove the eggs with a slotted spoon and place in a bowl of chilled water for 10 minutes. This prevents the grey sulphur ring.
  9. Crack the egg at several places on counter top or with a spoon and peel off the shell or place in refrigerator until you need to use them.


5 things you can do with boiled eggs

  1. Quarter them and add them to salads. Egg and potato salad is a delicious combination, but you don't have to restrict yourself to this alone.
  2. Make egg curry
  3. Saute sliced ginger, garlic, onions until the onions caramelise and add quartered boiled eggs to this, with seasonings to make Burmese style egg appetiser.
  4. Dip boiled egg in batter and deep fry to make delicious egg bhajji.
  5. Slice the boiled egg. Slice a tomato. Make egg & tomato sandwich.


What are your favourite things to do with boiled eggs?


How to make the perfect boiled egg?

Posted by admin


I have met a lot of hardboiled eggs in my time, but you're twenty minutes.” OSCAR WILDE

Before you scoff at me for writing this post - a properly boiled egg with a little sprinkle of salt and pepper is one of the simple joys of life and equally easy to mess up. Had with toast, or just by itself as a mid-day snack, or in your kid's lunch box, it's wholesome, easy and hardly takes any special effort. 

My earlier method of boiling an egg was to place it in a pan full of water and boil the hell out of it for 10 odd minutes, drain and peel. While this works well, the egg sometimes turns rubbery and the unpleasant grey sulphur ring inside that makes it so unpalatable.

The full credit for my current technique goes to Mark Bittman and his book 'How To Cook Everything Vegetarian'.


So here are my tips on getting the perfect boiled egg

  1. Buy the best quality eggs you can get.
  2. It helps if the eggs are not utterly fresh. A few day old eggs are so much easier to peel off than fresh eggs.
  3. Place the eggs in a deep pan. Cover them with tap water.
  4. Place this on the stove. 
  5. Bring the water to boil.
  6. They say swishing the water in the pan in circles helps center the yolks, in case you plan on making deviled eggs.
  7. Once the water comes to a rolling boil, turn off the flame. Cover with a fitting lid and let it sit for 10 minutes.
  8. After 10 minutes, remove the eggs with a slotted spoon and place in a bowl of chilled water for 10 minutes. This prevents the grey sulphur ring.
  9. Crack the egg at several places on counter top or with a spoon and peel off the shell or place in refrigerator until you need to use them.


5 things you can do with boiled eggs

  1. Quarter them and add them to salads. Egg and potato salad is a delicious combination, but you don't have to restrict yourself to this alone.
  2. Make egg curry
  3. Saute sliced ginger, garlic, onions until the onions caramelise and add quartered boiled eggs to this, with seasonings to make Burmese style egg appetiser.
  4. Dip boiled egg in batter and deep fry to make delicious egg bhajji.
  5. Slice the boiled egg. Slice a tomato. Make egg & tomato sandwich.


What are your favourite things to do with boiled eggs?


How to make yogurt in winters?


You need
1/2 litre milk (previously boiled is ideal)
Few small pots / cups (4-5)
1 heaped teaspoon of yogurt with live cultures

  • Warm the milk to a temperature where you can keep your little finger immersed in milk for 10 seconds - this will be considerably warmer than room temperature but one which is easily tolerable by your (clean) little finger.
  • Add the yogurt to this pan of milk and with a hand whisk, whisk well till combined and frothy.
  • Pour into small cups / containers and keep covered in a warm place like an oven or microwave for 6 hours. You could also set in small sized casseroles or kiddie hot-pack lunch boxes. 


Top 5 tips to make yogurt at home in winters
  1. Make sure the milk is reasonably warm.
  2. Set in smaller cups as this sets quicker than one large pot of yogurt.
  3. You could place the cups in a tray filled with warm water so the setting process starts off quickly.
  4. Adding a piece of green chilli to each cup also helps set the yogurt better. Don't worry, it wont make the yogurt spicy.
  5. Keep in a draught free place like the oven or the microwave. Don't turn on the oven by mistake though!


How to make yogurt in winters?

Posted by admin


You need
1/2 litre milk (previously boiled is ideal)
Few small pots / cups (4-5)
1 heaped teaspoon of yogurt with live cultures

  • Warm the milk to a temperature where you can keep your little finger immersed in milk for 10 seconds - this will be considerably warmer than room temperature but one which is easily tolerable by your (clean) little finger.
  • Add the yogurt to this pan of milk and with a hand whisk, whisk well till combined and frothy.
  • Pour into small cups / containers and keep covered in a warm place like an oven or microwave for 6 hours. You could also set in small sized casseroles or kiddie hot-pack lunch boxes. 


Top 5 tips to make yogurt at home in winters
  1. Make sure the milk is reasonably warm.
  2. Set in smaller cups as this sets quicker than one large pot of yogurt.
  3. You could place the cups in a tray filled with warm water so the setting process starts off quickly.
  4. Adding a piece of green chilli to each cup also helps set the yogurt better. Don't worry, it wont make the yogurt spicy.
  5. Keep in a draught free place like the oven or the microwave. Don't turn on the oven by mistake though!


Whole wheat penne in spinach sauce


I love penne and my husband loves spaghetti. Penne because, i like how the pasta gets the sauce inside the tubes - the ridges hold on to the sauce. Since I am the resident chef of our home, you'll find penne being the most-often cooked pasta. We love saucy sauces - well you know what I mean, more stuff around the pasta, instead of the dry pasta dish. We both love aglio-olio, where minimalism is the key, just good olive oil, garlic and chilli flakes - but that said, we do love the saucier versions better. Sometimes you'll find more veggies than the pasta in our dishes and we like it that way too.
This luscious spinach sauce was a result of me going overboard last week in the farmers' market. When you get 12 bunches for Rs.10, you can't really blame me can you? I washed, cleaned and cooked the leaves, pureed them and put the stuff in the freezer. It was a smart move, reducing a big bag of greens into a small container, besides cooking and freezing the leaves when they were at their freshest.

So when the day came to make the pasta, most of the work for the spinach sauce was already done - what remained was to pulse it with some fresh paneer and chillies and it was ready. It is indeed as simple as that.

Let me also assure you that I have not used any of my non-existent photoshop skills on this pic - the sauce is as green as it is seen in the picture and it looks like that even as I am about to eat it from the plate - no fooling you on that!

Recipe for Penne in Spinach Sauce
Serves 3-4 with a salad or a vegetable side dish

Ingredients
2 cups whole wheat penne pasta
Roughly 3/4 kg spinach, leaves and tender stems plucked
1 tsp olive oil
4-8 cloves garlic, peeled (4 if large, 8 if small)
1 medium onion, sliced
1 tsp dried oregano
2 green chillies
1/3rd cup paneer or ricotta cheese (I made fresh paneer from 1/2 litre milk, using white vinegar)
Salt to taste

Directions
  1. Making spinach puree -Wash the plucked spinach leaves and tender stems 4-5 times in a clean sink of water or in a large tub. Dry over kitchen towels. Put these into a large pot. Add 1/2 tsp sugar, 1/2 cup water and let the leaves wilt. Toss around so the leaves are evenly cooked. Remove from pot, and puree along with any residual water. This can be frozen for upto a week and used as necessary. 3/4 kg of spinach will yield roughly 2 cup of spinach puree.
  2. Cook pasta according to instructions on pack, drain, reserving 1 cup of pasta water.
  3. Making paneer - Bring 1/2 L cow's milk to boil. When it comes to a boil, reduce heat and add from 1-2 tsp of white vinegar, stirring around till the milk curdles leaving a clear whey. Filter out pressing lightly. Reserve the whey for use in soups or to make dough for chapatis or bread.
  4. In a wok, heat 1-2 tsp olive oil. Throw in the crushed garlic cloves and sliced onions. Saute on medium flame for 2-3 minutes till soft.
  5. In a blender, puree together the spinach puree, paneer, sauteed onion-garlic, oregano, salt and chillies. Check for salt and adjust. This is your spinach sauce for the pasta.
  6. In a large wok, bring together cooked pasta and the sauce, mixing gently till pasta is fully covered. Use some of the reserved pasta water if you want to thin down the sauce. Add freshly ground black pepper over the top, any fresh or dried herbs of your choice and serve.
I served this with cauliflower baked in tomato sauce, recipe of which will be posted shortly.

Notes
  • You can serve with some cheese grated on the top, this will gain most kids' approval :)
  • The sauce can be made minus the paneer but I used so as to up the protein quotient of the dish. You could use ricotta cheese from a tub to cut down on the preparation time or use store bought paneer.
  • Some steamed corn added to this pasta will add lovely colour and a sweet crunch to the dish.
If you like spaghetti and your partner likes penne, by all means use spaghetti for this dish!! 

Since there is a perfect event to enlist this recipe, it's going for the Healing Foods event at My Culinary Experiments started by Siri's Corner

Whole wheat penne in spinach sauce

Posted by admin


I love penne and my husband loves spaghetti. Penne because, i like how the pasta gets the sauce inside the tubes - the ridges hold on to the sauce. Since I am the resident chef of our home, you'll find penne being the most-often cooked pasta. We love saucy sauces - well you know what I mean, more stuff around the pasta, instead of the dry pasta dish. We both love aglio-olio, where minimalism is the key, just good olive oil, garlic and chilli flakes - but that said, we do love the saucier versions better. Sometimes you'll find more veggies than the pasta in our dishes and we like it that way too.
This luscious spinach sauce was a result of me going overboard last week in the farmers' market. When you get 12 bunches for Rs.10, you can't really blame me can you? I washed, cleaned and cooked the leaves, pureed them and put the stuff in the freezer. It was a smart move, reducing a big bag of greens into a small container, besides cooking and freezing the leaves when they were at their freshest.

So when the day came to make the pasta, most of the work for the spinach sauce was already done - what remained was to pulse it with some fresh paneer and chillies and it was ready. It is indeed as simple as that.

Let me also assure you that I have not used any of my non-existent photoshop skills on this pic - the sauce is as green as it is seen in the picture and it looks like that even as I am about to eat it from the plate - no fooling you on that!

Recipe for Penne in Spinach Sauce
Serves 3-4 with a salad or a vegetable side dish

Ingredients
2 cups whole wheat penne pasta
Roughly 3/4 kg spinach, leaves and tender stems plucked
1 tsp olive oil
4-8 cloves garlic, peeled (4 if large, 8 if small)
1 medium onion, sliced
1 tsp dried oregano
2 green chillies
1/3rd cup paneer or ricotta cheese (I made fresh paneer from 1/2 litre milk, using white vinegar)
Salt to taste

Directions
  1. Making spinach puree -Wash the plucked spinach leaves and tender stems 4-5 times in a clean sink of water or in a large tub. Dry over kitchen towels. Put these into a large pot. Add 1/2 tsp sugar, 1/2 cup water and let the leaves wilt. Toss around so the leaves are evenly cooked. Remove from pot, and puree along with any residual water. This can be frozen for upto a week and used as necessary. 3/4 kg of spinach will yield roughly 2 cup of spinach puree.
  2. Cook pasta according to instructions on pack, drain, reserving 1 cup of pasta water.
  3. Making paneer - Bring 1/2 L cow's milk to boil. When it comes to a boil, reduce heat and add from 1-2 tsp of white vinegar, stirring around till the milk curdles leaving a clear whey. Filter out pressing lightly. Reserve the whey for use in soups or to make dough for chapatis or bread.
  4. In a wok, heat 1-2 tsp olive oil. Throw in the crushed garlic cloves and sliced onions. Saute on medium flame for 2-3 minutes till soft.
  5. In a blender, puree together the spinach puree, paneer, sauteed onion-garlic, oregano, salt and chillies. Check for salt and adjust. This is your spinach sauce for the pasta.
  6. In a large wok, bring together cooked pasta and the sauce, mixing gently till pasta is fully covered. Use some of the reserved pasta water if you want to thin down the sauce. Add freshly ground black pepper over the top, any fresh or dried herbs of your choice and serve.
I served this with cauliflower baked in tomato sauce, recipe of which will be posted shortly.

Notes
  • You can serve with some cheese grated on the top, this will gain most kids' approval :)
  • The sauce can be made minus the paneer but I used so as to up the protein quotient of the dish. You could use ricotta cheese from a tub to cut down on the preparation time or use store bought paneer.
  • Some steamed corn added to this pasta will add lovely colour and a sweet crunch to the dish.
If you like spaghetti and your partner likes penne, by all means use spaghetti for this dish!! 

Since there is a perfect event to enlist this recipe, it's going for the Healing Foods event at My Culinary Experiments started by Siri's Corner

How to prepare mint powder or dried mint

How to prepare mint powder / dried mint

1. Start with a big bunch of fresh mint leaves.
2. Wash thoroughly 3-4 times in a large tub of water till all the sand is washed off.
3. Shake off excess water. Spread on newspaper or any absorbent cloth in a single layer till dry.
4. Remove on a sheet pan or several trays as per quantity of mint stalks and keep under sun for 2 days, taking it indoors when sun is down.
5. In absence of sunlight or drying facility, spread it in microwave and on High power, zap for 2-3 minutes, turning them around a couple of times in between.
6. After two days of sun drying or microwave drying, the leaves will become crispy, and you can easily slide them off the stalks. With finger tips, crush this to a fine powder and store in airtight jar. One bunch of leaves yielded roughly 2 tbsp of mint powder.

5 uses with mint powder / dried mint

Sprinkle on parathas to make pudina paratha

Sprinkle of raitas instead of fresh coriander leaves

Add to salad dressings for a fresh taste

Add to Indian vegetable and dal preparations for adding a new taste dimension

Add to lemonades, mojitos and spicy buttermilk (chaas)

The same process can be used to prepare dried basil, dried oregano, dried coriander, dried thyme or any such dried herbs. It is a good way to preserve large packets of fresh herbs when in season or if the supermarket doesn't sell small bunches of the fresh herb.

How to prepare mint powder or dried mint

Posted by admin

How to prepare mint powder / dried mint

1. Start with a big bunch of fresh mint leaves.
2. Wash thoroughly 3-4 times in a large tub of water till all the sand is washed off.
3. Shake off excess water. Spread on newspaper or any absorbent cloth in a single layer till dry.
4. Remove on a sheet pan or several trays as per quantity of mint stalks and keep under sun for 2 days, taking it indoors when sun is down.
5. In absence of sunlight or drying facility, spread it in microwave and on High power, zap for 2-3 minutes, turning them around a couple of times in between.
6. After two days of sun drying or microwave drying, the leaves will become crispy, and you can easily slide them off the stalks. With finger tips, crush this to a fine powder and store in airtight jar. One bunch of leaves yielded roughly 2 tbsp of mint powder.

5 uses with mint powder / dried mint

Sprinkle on parathas to make pudina paratha

Sprinkle of raitas instead of fresh coriander leaves

Add to salad dressings for a fresh taste

Add to Indian vegetable and dal preparations for adding a new taste dimension

Add to lemonades, mojitos and spicy buttermilk (chaas)

The same process can be used to prepare dried basil, dried oregano, dried coriander, dried thyme or any such dried herbs. It is a good way to preserve large packets of fresh herbs when in season or if the supermarket doesn't sell small bunches of the fresh herb.

The all Indian Strawberry Cheesecake in Summer Series


Sorry for the longish break, dear friends! I was busy with deadlines and then a wonderul family get-together. Now I am back with the recipe for a strawberry cheesecake made with all Indian ingredients, as promised!
The inspiration came from the Good Food show on NDTV ne
ws channel. I had done a very long post on this a while ago, and lost the whole of it due to some parallel sign in -sign out activity on gmail. It is indeed difficult to recapture all that I'd written, but in case some instructions aren't clear, please write in your queries and I shall be happy to respond!

I must give 100% credit to a recipe I saw on the Good Food show some weeks ago. With frozen strawberries sitting in my fridge, all I needed was to work on getting the hung yogurt and I could start of on making my dream cheesecake. If I had to put in more descriptors, I'd say - No springform pan, no Graham crackers, no cream cheese, no water bath, no baking and hey this is NO JOKING!!!


Strawberry cheesecake with Indian ingredients
Makes a 750 gm cake
Adapted from NDTV cooks


Preparation
How to get hung yogurt
If you'd like to made yogurt at home, first mix in a tsp of good homemade yogurt into One Litre boiled and cooled milk at slightly higher temperature than body tem
perature. Stir the milk well, cover tightly and keep in a warm corner for 5-6 hours. Keep a large strainer covered with a folded muslin cloth over a vessel. Once the yogurt is set well, turn in into the muslin covered strainer. Twist the muslin cloth and clip / tie it at the mouth. If the weather in your area is very hot, keep the strainer with yogurt over a vessel in the refrigerator for 5-6 hours until all the water (whey) is drained out. If you are not making the cheesecake immediately, store this thick block of curd in an airtight container in the refrigerator. Use within 24 hours so that it does not turn sour.
You can also use store bought yogurt like Nestle Dahi. You will need 2 tubs of 400 mg and one 200 mg tub to get a packed cup of hung yogurt.

Ingredients
200 gm Parle G + Digestive Marie biscuits
3 tbsp melted butter

250 gm frozen strawberries (do not thaw)
1/2 cup sugar

1 cup hung curd
1 cup cream

1 tbsp gelatin
4 tbsp water

2-3 tbsp Blueberry jam for topping

Other equipment
Am 8-9" cake tin
Cling film

or

an 8" springform pan

Directions

In a food processor, pulse the biscuits into coarse powder and mix in the melted butter well into it.
Take a cake tin 8-9" diameter, line it with a large sheet of cling film big enough to cover the sides and come well out of the brim.

Put in the biscuit-butter mix into the pan lined with film. Spread evenly and press well with heavy object such as mortar. Put in the freezer for 20 min or so to set.


Puree the frozen strawberries and sugar together in a mixer to get a sorbet kind of mixture. Remove into a large bowl and keep aside.


Add the hung curd and cream, blend well to make a smooth mixture. Pour it into the bowl containing strawberry sorbet, mix them well with a wooden spoon.

Add 4 tbsp of water in the gelatin in a small heat resistant cup. Using a pair of tongs, hold the cup on the surface of water boiling in a pan. Stir the gelatin mix with a spoon continuously to get a clear liquid.

Pour the gelatin mix slowly into the strawberry mixture, stirring continuously.

Remove the set crust from the freezer and pour the strawberry mixture onto the set biscuit base.

Cover and put in the fridge to set overnight.


Top with a thin layer of jam or sliced fresh strawberries, cut into wedges and serve cold.


Notes
Jam - I used St. Dalfours brand blueberry jam which is made in grape juice and with no added sugar. This is available in most stores in India, imported by Weikfield.
The cream used in this recipe was a 200 ml tetrapack of Amul cream

Verdict
As you can see, the cheesecake looked dainty and mouthwateringly enticing.
The crust was a good mix of sweetness from the Glucose biscuits and crispy crunch of the digestives. We could not make out any gelatiney texture or bad flavours in the cake. The topping made with blueberry jam complemented the strawberries beautifully. My two guests loved this one whole heartedly and DH gave the thumbs up sign as usual!

Me to you
I might just add the melted butter while grinding biscuits, next time for a more uniform spread. With the mango season right upon us, Version 1.2 of the cheesecake will obviously be made with Alfonso mangoes. Wait for the update!

No springform pan? The cling film covering a regular pan till its brim worked just perfectly. While unmoulding, just pick up the cake by lifting up the edges of the film and deposit in onto a serving plate.

I really liked the idea of using yogurt instead of cream cheese. Firstly we don't have any Indian brand of cream cheese, the imported ones have scary manufacturing dates and cost a bomb. Not to mention, how fattening they can be, unless ofcourse you opt for the low-fat version. Yogurt all said has its benefits being rich in calcium, protein and best thing is that it is just such a household ingredient in Indian homes. I promptly drank up the cold leftover whey, which felt heavenly on that hot afternoon. You can use this as stock or use it for binding dough. It is too high is nutrients to let it go down the drain.

Cream ofcourse is high calorie and there's nothing we can do about it except exercise some moderation when it comes to eating this (which is truly difficult, trust me - you don't wanna know how much of this cake i ate up by myself)

You can easily adapt this into a diabetic recipe by using sugar substitute instead of sugar. A word of caution though - since cream is quite rich, diabetics must be content with a small slice at a time.

I have myself been in search of a cheesecake that I can make at home and looks like this is truly the one. So all you cheesecake lovers who don't have access to fancy schmancy ingredients, do give this one a try and let me know how you liked it.

You'll find me here too
Burrp.com is a new foodie review website and I have just begun reviewing on the Mumbai edition. Check here for the review of Pratap's: The Dhaba at Lokhandwala, Mumbai

The all Indian Strawberry Cheesecake in Summer Series

Posted by admin


Sorry for the longish break, dear friends! I was busy with deadlines and then a wonderul family get-together. Now I am back with the recipe for a strawberry cheesecake made with all Indian ingredients, as promised!
The inspiration came from the Good Food show on NDTV ne
ws channel. I had done a very long post on this a while ago, and lost the whole of it due to some parallel sign in -sign out activity on gmail. It is indeed difficult to recapture all that I'd written, but in case some instructions aren't clear, please write in your queries and I shall be happy to respond!

I must give 100% credit to a recipe I saw on the Good Food show some weeks ago. With frozen strawberries sitting in my fridge, all I needed was to work on getting the hung yogurt and I could start of on making my dream cheesecake. If I had to put in more descriptors, I'd say - No springform pan, no Graham crackers, no cream cheese, no water bath, no baking and hey this is NO JOKING!!!


Strawberry cheesecake with Indian ingredients
Makes a 750 gm cake
Adapted from NDTV cooks


Preparation
How to get hung yogurt
If you'd like to made yogurt at home, first mix in a tsp of good homemade yogurt into One Litre boiled and cooled milk at slightly higher temperature than body tem
perature. Stir the milk well, cover tightly and keep in a warm corner for 5-6 hours. Keep a large strainer covered with a folded muslin cloth over a vessel. Once the yogurt is set well, turn in into the muslin covered strainer. Twist the muslin cloth and clip / tie it at the mouth. If the weather in your area is very hot, keep the strainer with yogurt over a vessel in the refrigerator for 5-6 hours until all the water (whey) is drained out. If you are not making the cheesecake immediately, store this thick block of curd in an airtight container in the refrigerator. Use within 24 hours so that it does not turn sour.
You can also use store bought yogurt like Nestle Dahi. You will need 2 tubs of 400 mg and one 200 mg tub to get a packed cup of hung yogurt.

Ingredients
200 gm Parle G + Digestive Marie biscuits
3 tbsp melted butter

250 gm frozen strawberries (do not thaw)
1/2 cup sugar

1 cup hung curd
1 cup cream

1 tbsp gelatin
4 tbsp water

2-3 tbsp Blueberry jam for topping

Other equipment
Am 8-9" cake tin
Cling film

or

an 8" springform pan

Directions

In a food processor, pulse the biscuits into coarse powder and mix in the melted butter well into it.
Take a cake tin 8-9" diameter, line it with a large sheet of cling film big enough to cover the sides and come well out of the brim.

Put in the biscuit-butter mix into the pan lined with film. Spread evenly and press well with heavy object such as mortar. Put in the freezer for 20 min or so to set.


Puree the frozen strawberries and sugar together in a mixer to get a sorbet kind of mixture. Remove into a large bowl and keep aside.


Add the hung curd and cream, blend well to make a smooth mixture. Pour it into the bowl containing strawberry sorbet, mix them well with a wooden spoon.

Add 4 tbsp of water in the gelatin in a small heat resistant cup. Using a pair of tongs, hold the cup on the surface of water boiling in a pan. Stir the gelatin mix with a spoon continuously to get a clear liquid.

Pour the gelatin mix slowly into the strawberry mixture, stirring continuously.

Remove the set crust from the freezer and pour the strawberry mixture onto the set biscuit base.

Cover and put in the fridge to set overnight.


Top with a thin layer of jam or sliced fresh strawberries, cut into wedges and serve cold.


Notes
Jam - I used St. Dalfours brand blueberry jam which is made in grape juice and with no added sugar. This is available in most stores in India, imported by Weikfield.
The cream used in this recipe was a 200 ml tetrapack of Amul cream

Verdict
As you can see, the cheesecake looked dainty and mouthwateringly enticing.
The crust was a good mix of sweetness from the Glucose biscuits and crispy crunch of the digestives. We could not make out any gelatiney texture or bad flavours in the cake. The topping made with blueberry jam complemented the strawberries beautifully. My two guests loved this one whole heartedly and DH gave the thumbs up sign as usual!

Me to you
I might just add the melted butter while grinding biscuits, next time for a more uniform spread. With the mango season right upon us, Version 1.2 of the cheesecake will obviously be made with Alfonso mangoes. Wait for the update!

No springform pan? The cling film covering a regular pan till its brim worked just perfectly. While unmoulding, just pick up the cake by lifting up the edges of the film and deposit in onto a serving plate.

I really liked the idea of using yogurt instead of cream cheese. Firstly we don't have any Indian brand of cream cheese, the imported ones have scary manufacturing dates and cost a bomb. Not to mention, how fattening they can be, unless ofcourse you opt for the low-fat version. Yogurt all said has its benefits being rich in calcium, protein and best thing is that it is just such a household ingredient in Indian homes. I promptly drank up the cold leftover whey, which felt heavenly on that hot afternoon. You can use this as stock or use it for binding dough. It is too high is nutrients to let it go down the drain.

Cream ofcourse is high calorie and there's nothing we can do about it except exercise some moderation when it comes to eating this (which is truly difficult, trust me - you don't wanna know how much of this cake i ate up by myself)

You can easily adapt this into a diabetic recipe by using sugar substitute instead of sugar. A word of caution though - since cream is quite rich, diabetics must be content with a small slice at a time.

I have myself been in search of a cheesecake that I can make at home and looks like this is truly the one. So all you cheesecake lovers who don't have access to fancy schmancy ingredients, do give this one a try and let me know how you liked it.

You'll find me here too
Burrp.com is a new foodie review website and I have just begun reviewing on the Mumbai edition. Check here for the review of Pratap's: The Dhaba at Lokhandwala, Mumbai

Detox diet - Part II - Weekend detox plan

After the wonderful response to my earlier post, I thought it would do good to share a sample plan which you can try over the weekend. This is adapted from the interview of a Bombay based nutritionist that I did while doing a feature on the same topic. I will try and answer the rest of the questions asked in response to the earlier post in its comments section.

How to do a weekend Detox Plan

Day 1


Plenty of water and fruits for the entire day in unlimited quantity. Include all fruits excluding bananas and chickoo.

Breakfast: Water melon.

Mid Morning: Apple

Lunch: Papaya with lemon squeezed on it.

4 PM: Grapes

6 PM: Oranges

Dinner: Papaya

Day 2

Breakfast: Any melon

Lunch: Salads + Vegetables + Pineapple. Use cold pressed organic oils (either sesame or ground nut) No potato should be included.

Mid Evening: Banana

Dinner: Salad + Vegetable + Soup.

Day 3

Breakfast: Fruits with a herbal tea like peppermint tea

Lunch: Salad + Vegetables + Sprouts + 1 Roti

Mid Evening: Any fruit

Dinner: Salad + vegetable+ soup + brown rice

Very important

  • This diet MUST NOT be done by sick, convalescing or diabetic people without the approval of their doctor.
  • There is no scope for any kind of diet for a pregnant woman.
  • Even if you are in the best of health, it is better to take it easy during the detox days, drink plenty of water and take ample rest.

Some pointers

  • Eating out and socialising are almost impossible when on this diet, so choose the dates accordingly.
  • The problem with detox diets is that the weight loss achieved is usually temporary and is the result of water loss and a minimal fat loss due to severe calorie restriction. The weight comes straight back after the diet is done, which is why Detox diets are not essentially weight loss diets.
  • Some people also experience side effects like tiredness, acid regurge and headaches. While many believe that this result of toxins being expelled, it’s usually caused by a low sugar level.


Detox diet - Part II - Weekend detox plan

Posted by admin

After the wonderful response to my earlier post, I thought it would do good to share a sample plan which you can try over the weekend. This is adapted from the interview of a Bombay based nutritionist that I did while doing a feature on the same topic. I will try and answer the rest of the questions asked in response to the earlier post in its comments section.

How to do a weekend Detox Plan

Day 1


Plenty of water and fruits for the entire day in unlimited quantity. Include all fruits excluding bananas and chickoo.

Breakfast: Water melon.

Mid Morning: Apple

Lunch: Papaya with lemon squeezed on it.

4 PM: Grapes

6 PM: Oranges

Dinner: Papaya

Day 2

Breakfast: Any melon

Lunch: Salads + Vegetables + Pineapple. Use cold pressed organic oils (either sesame or ground nut) No potato should be included.

Mid Evening: Banana

Dinner: Salad + Vegetable + Soup.

Day 3

Breakfast: Fruits with a herbal tea like peppermint tea

Lunch: Salad + Vegetables + Sprouts + 1 Roti

Mid Evening: Any fruit

Dinner: Salad + vegetable+ soup + brown rice

Very important

  • This diet MUST NOT be done by sick, convalescing or diabetic people without the approval of their doctor.
  • There is no scope for any kind of diet for a pregnant woman.
  • Even if you are in the best of health, it is better to take it easy during the detox days, drink plenty of water and take ample rest.

Some pointers

  • Eating out and socialising are almost impossible when on this diet, so choose the dates accordingly.
  • The problem with detox diets is that the weight loss achieved is usually temporary and is the result of water loss and a minimal fat loss due to severe calorie restriction. The weight comes straight back after the diet is done, which is why Detox diets are not essentially weight loss diets.
  • Some people also experience side effects like tiredness, acid regurge and headaches. While many believe that this result of toxins being expelled, it’s usually caused by a low sugar level.


Detox diets - An overview


Spring is supposed to be the best time not only for spring cleaning but also for cleaning up the mileu interior of our body. A few pointers on how to get into a detox diet and how it helps are outlined in this article.


Detox seems to be buzz word among the health conscious. It is something akin to spring cleaning your house. Dusting, vacuuming, throwing away used, old stuff and creating a fresh, clean atmosphere inside your body. Our body has a detoxifying system in place made up of the liver, lungs, kidneys, gastrointestinal tract, and skin, all of which work to eliminate toxins that enter our body thorough air, water, food and skin. But considering the times we live in, the kind of foods we eat, the lifestyle we follow present too tough a task for these built-in detoxification systems. Some of these un-tackled toxins start building up in our bodies causing a host of health problems like loss of vitality, dull skin and hair, weight gain, abdominal bloating, indigestion and a general feeling of ill-health.

Detoxification therefore becomes essential to make our body jumpstart itself out of the rut of toxin build-up towards a life filled with vitality. The complete detox process includes cleansing of the liver, colon, kidneys and the diet is vital to overall cleansing. A high fibre diet helps in eliminating residual waste from your intestines, the vitamins and nutrition made available by eating fresh fruits, vegetables and nuts provides all the vital enzymes for cleansing the liver and kidneys. Taking a steam bath or a sauna and performing exercise, helps sweat out the toxins accumulated in the skin.


Essentials of a Detox diet

In a detox diet, you avoid certain foods that overload the system and eat other nutrition-rich foods that speed up mopping of old toxins and waste.

This diet will exclude allergenic foods, which may cause problems with digestion and elimination. Foods like wheat (glutens) and dairy (milk, cheese) are often the cause of many unknown allergies where the person may just be feeling poorly or a sense of bloating and discomfort. Refined sugar is eliminated because of its zero nutritional value and therefore empty calories. Meats are excluded because they may contain added hormones and/or antibiotics and are very difficult to process, taking a long time to be cleared by the digestive system. Tea, coffee and fizzy drinks are also out because they slow down the process of cleansing. Herbal teas are allowed though. Refined, processed and refined, fried or junk foods are also a no-no for any detox program to work.

Eating grains, vegetables and fruits closest to it's natural form are best while following such a plan. Over cooking destroys the nutritional value of these high nutrition foods. Eating raw, juicing or steaming for 3-4 minutes would be the best options.


The Ayurvedic Angle - According to Ayurveda, the best time to go through a detox routine is the time after winter. A complete ayurvedic cleansing program includes 15 days of preparation and 45 days of actual cleansing.

Ama is the residual matter of incomplete digestion-- sticky toxic substance that clogs the channels that carry nutrients to the cells and waste out of the body. Cleansing is done to eliminate ama out of the body. It is essential for this purpose that a person wanting to clear ama shouldn't eat any ama producing foods during this period and eat more of ama reducing foods.

Ama increasing foods*

Ama reducing foods*

Food grown with high level pesticides, chemicals

Lightly cooked vegetables

Deep fried food

Mung bean soup

Dairy products – Cheese, Yogurt, whole milk

Sweet juicy fruits – apple, pears, prunes

Sugar / fat laden sweets

Cooked leafy greens

Breads and biscuits

Light whole grains such as quinoa, barley, amaranth and small helpings of rice


Spices like ginger, turmeric, coriander, fennel to be used with all the above

    *Source- Maharishi Ayurveda

Along with the above principles, it is recommended to drink warm water throughout the day to help flush out toxins through urine. A herbal tea made by boiling ginger and fennel is also a good detoxifying agent.

Certain rasayanas (Ayurvedic formulations) are prescribed along with the above diet for maximum effect. These should be taken under the guidance of a qualified Ayurvedic Practitioner.

8 detox ideas for life

  1. Water – Keep sipping water throughout the day consuming upto 2 litres. Don't gulp glasses of water hastily as you may swallow a lot of air which in turn causes bloating.

  2. Air – Make sure you take a brisk walk in a natural setting preferably. This revs up your circulation and flushes out toxins to the kidneys and liver.

  3. Go gradual – Reduce the frequency with which you eat refined foods, red meats, sugar. Go for cereals with half the sugar content of your current sugary cereal, or mix a no-sugar cereal with your sugary cereal. Slow changes make it easier for you to stick by them for life and not just be a follower of fads.

  4. Keep up the taste – Good food can be tasty too. Ginger, garlic, lemon rind, freshly sqeezed orange, cayenne pepper, black pepper, fennel are some of the spices and flavourings you can add to food to give it a zing and tantalise your taste buds.

  5. Fibre – For any meal, choose ingredients with high fibre content. Fibre is the best natural detoxifying agent, sweeping down all the collected debris in the intestines. Choose whole wheat bread over white bread. Play with interesting grains like cracked wheat, red unpolished rice, millets for creating a variety in your meals.

  6. Chew – Age-old granny wisdom but completely true. Ever since we started having TV dinners, we have forgotten to chew food. Mixing food well with saliva makes it alkaline and therefore less harmful than unchwed food. Not chewing your food properly also means that it stays longer in your gut, fermenting in your intestine causing indigestion and bloating.

  7. Organic food – Food that has been not been treated with harsh chemicals and has grown naturally will be naturally good for you. If you have access to organically grown produce, by all means go for it or if you have the means to growing it yourself, nothing like it!

  8. Skin brushing - Brushing your body with a soft skin brush rushes blood to the surface capillaries and toxins are eliminated from the pores. Use long sweeps, start at the feet and work up towards the heart. It is a good practice to follow each day for 5 minutes before a shower.

A word of caution

While it is good to follow a detox plan once in a while, or a natural foods diet for life, it is important not to go overboard with fruit juice diets or with fasting diets. They may sound very healthful and a fast-forward way to losing weight, but may do more good than harm by disturbing electrolyte balance and causing loss of muscle. Gettign into a detox regime with the knowledge and approval of your doctor or a qualified nutritionist is the best way to go about it. Moderation is the key to anything and so also to detoxification diets.

This article is copyrighted. Do not copy. To send query for such articles, you can contact the author of the blog.


Detox diets - An overview

Posted by admin


Spring is supposed to be the best time not only for spring cleaning but also for cleaning up the mileu interior of our body. A few pointers on how to get into a detox diet and how it helps are outlined in this article.


Detox seems to be buzz word among the health conscious. It is something akin to spring cleaning your house. Dusting, vacuuming, throwing away used, old stuff and creating a fresh, clean atmosphere inside your body. Our body has a detoxifying system in place made up of the liver, lungs, kidneys, gastrointestinal tract, and skin, all of which work to eliminate toxins that enter our body thorough air, water, food and skin. But considering the times we live in, the kind of foods we eat, the lifestyle we follow present too tough a task for these built-in detoxification systems. Some of these un-tackled toxins start building up in our bodies causing a host of health problems like loss of vitality, dull skin and hair, weight gain, abdominal bloating, indigestion and a general feeling of ill-health.

Detoxification therefore becomes essential to make our body jumpstart itself out of the rut of toxin build-up towards a life filled with vitality. The complete detox process includes cleansing of the liver, colon, kidneys and the diet is vital to overall cleansing. A high fibre diet helps in eliminating residual waste from your intestines, the vitamins and nutrition made available by eating fresh fruits, vegetables and nuts provides all the vital enzymes for cleansing the liver and kidneys. Taking a steam bath or a sauna and performing exercise, helps sweat out the toxins accumulated in the skin.


Essentials of a Detox diet

In a detox diet, you avoid certain foods that overload the system and eat other nutrition-rich foods that speed up mopping of old toxins and waste.

This diet will exclude allergenic foods, which may cause problems with digestion and elimination. Foods like wheat (glutens) and dairy (milk, cheese) are often the cause of many unknown allergies where the person may just be feeling poorly or a sense of bloating and discomfort. Refined sugar is eliminated because of its zero nutritional value and therefore empty calories. Meats are excluded because they may contain added hormones and/or antibiotics and are very difficult to process, taking a long time to be cleared by the digestive system. Tea, coffee and fizzy drinks are also out because they slow down the process of cleansing. Herbal teas are allowed though. Refined, processed and refined, fried or junk foods are also a no-no for any detox program to work.

Eating grains, vegetables and fruits closest to it's natural form are best while following such a plan. Over cooking destroys the nutritional value of these high nutrition foods. Eating raw, juicing or steaming for 3-4 minutes would be the best options.


The Ayurvedic Angle - According to Ayurveda, the best time to go through a detox routine is the time after winter. A complete ayurvedic cleansing program includes 15 days of preparation and 45 days of actual cleansing.

Ama is the residual matter of incomplete digestion-- sticky toxic substance that clogs the channels that carry nutrients to the cells and waste out of the body. Cleansing is done to eliminate ama out of the body. It is essential for this purpose that a person wanting to clear ama shouldn't eat any ama producing foods during this period and eat more of ama reducing foods.

Ama increasing foods*

Ama reducing foods*

Food grown with high level pesticides, chemicals

Lightly cooked vegetables

Deep fried food

Mung bean soup

Dairy products – Cheese, Yogurt, whole milk

Sweet juicy fruits – apple, pears, prunes

Sugar / fat laden sweets

Cooked leafy greens

Breads and biscuits

Light whole grains such as quinoa, barley, amaranth and small helpings of rice


Spices like ginger, turmeric, coriander, fennel to be used with all the above

    *Source- Maharishi Ayurveda

Along with the above principles, it is recommended to drink warm water throughout the day to help flush out toxins through urine. A herbal tea made by boiling ginger and fennel is also a good detoxifying agent.

Certain rasayanas (Ayurvedic formulations) are prescribed along with the above diet for maximum effect. These should be taken under the guidance of a qualified Ayurvedic Practitioner.

8 detox ideas for life

  1. Water – Keep sipping water throughout the day consuming upto 2 litres. Don't gulp glasses of water hastily as you may swallow a lot of air which in turn causes bloating.

  2. Air – Make sure you take a brisk walk in a natural setting preferably. This revs up your circulation and flushes out toxins to the kidneys and liver.

  3. Go gradual – Reduce the frequency with which you eat refined foods, red meats, sugar. Go for cereals with half the sugar content of your current sugary cereal, or mix a no-sugar cereal with your sugary cereal. Slow changes make it easier for you to stick by them for life and not just be a follower of fads.

  4. Keep up the taste – Good food can be tasty too. Ginger, garlic, lemon rind, freshly sqeezed orange, cayenne pepper, black pepper, fennel are some of the spices and flavourings you can add to food to give it a zing and tantalise your taste buds.

  5. Fibre – For any meal, choose ingredients with high fibre content. Fibre is the best natural detoxifying agent, sweeping down all the collected debris in the intestines. Choose whole wheat bread over white bread. Play with interesting grains like cracked wheat, red unpolished rice, millets for creating a variety in your meals.

  6. Chew – Age-old granny wisdom but completely true. Ever since we started having TV dinners, we have forgotten to chew food. Mixing food well with saliva makes it alkaline and therefore less harmful than unchwed food. Not chewing your food properly also means that it stays longer in your gut, fermenting in your intestine causing indigestion and bloating.

  7. Organic food – Food that has been not been treated with harsh chemicals and has grown naturally will be naturally good for you. If you have access to organically grown produce, by all means go for it or if you have the means to growing it yourself, nothing like it!

  8. Skin brushing - Brushing your body with a soft skin brush rushes blood to the surface capillaries and toxins are eliminated from the pores. Use long sweeps, start at the feet and work up towards the heart. It is a good practice to follow each day for 5 minutes before a shower.

A word of caution

While it is good to follow a detox plan once in a while, or a natural foods diet for life, it is important not to go overboard with fruit juice diets or with fasting diets. They may sound very healthful and a fast-forward way to losing weight, but may do more good than harm by disturbing electrolyte balance and causing loss of muscle. Gettign into a detox regime with the knowledge and approval of your doctor or a qualified nutritionist is the best way to go about it. Moderation is the key to anything and so also to detoxification diets.

This article is copyrighted. Do not copy. To send query for such articles, you can contact the author of the blog.


How to snack and lose weight

I was exercising like a maniac, eating the right foods, no in between grazing and yet my weight refused to budge. Since I did not have too much to lose in the first place, it was all the more difficult. While I'd like to believe that I'm just a little short of a health freak, I didn't have a figure to match. When I went to a nutritionist with my concerns, the diet plan they drew out for me was so much more than what I was eating already. At least 4 meals a day, and the Ms. Cynical in me said - "Wow! That's generous! But will it work?"

Work it did and I am now almost close to the number I desire. And I not obsessed with it either. As a part of the weight loss tips that I plan to include here, snacking is one of them.


How snacking helps weight loss

A little something inbetween meals helps in two ways.

  1. Prevents your metabolism from dipping. A good BMR (basal metabolic rate) is very important to make sure your body keeps burning calories at its resting state. Prolonged periods for fasting (like skipping breakfast) will convince your body that something is wrong and it has to conserve as much as possible.
  2. Keeps your blood sugar at stable levels, hence prevents cravings.
  3. You are better prepared for dinner time. The 200 calorie odd snack will make sure you don't feel terribly hungry and ready to jump on everything on the table at dinner.

How snacking helps diabetics

Most busy executives start their day with hardly any breakfast, have a greasy office canteen lunch ( especially in India) at around 2 PM, some rounds of tea / coffee to sustain till they manage to get out and then prowl for some fried chips / munchies at around 9 PM with a heavy dinner at around 10.30 PM. The gap between 2 PM and 9 PM is the critical time where blood sugar takes a dive. Maintenance of sugar levels through out the day is essential to management of diabetes. Here's where snacking comes to the rescue. A fruit or a trail mix would be ideal to break the 2pm - 9 PM fast and stabilize sugar levels.

The snacker's grocery list

That's my secret list for you. Not too many exotic ingredients, nothing that you wouldn't find in your supermarket. If I get them in Mumbai, then you can find them in pretty much any other city.

Buy a pound of unroasted, unsalted peanuts. Roast them either in your microwave or stove top, cool and store in an airtight container. To snack on them, don't grab a bowlful. Take a handful, mix it with one each of finely chopped cucumber, tomato and onion (small sized). Squeeze half a lemon, sprinkle salt, cayenne pepper, coriander leaves and you have a crunchy, yummy peanut snack ready.

Do the same with the soy nuts and almonds, puffed rice or other soy products.

Any of the nuts can be bulked up by adding raw grated veggies and flavourings so that you don't eat too much of the high calorie nuts.

Snacking tips

The super-size culture is fast catching on in India too, and it started with the 2 Litre 2.5 Litre pet bottles of colas, never mind that the 500 ml is free! The Lays and the Kurkures followed suit and we are not surprised to see supersized people too.

No snacking from the bag

I'm sure if you are snacking for weight loss, you wouldn't even pass by the 'Chips' or 'Crisps' aisles. But this is true even for the healthy stuff like nuts or puffed soy snacks. Don't eat from the bag. Have the patience to remove it into a small bowl, mix it with the veggies & flavourings, keep it aside, lock /seal the bag, put it away, take your bowl to the living room and munch on it as if you would eat a gourmet meal. Savour, chew and eat. If quality of food matters, quantity matters even more. I was earlier of the opinion that if something is low-cal, healthy and good for me, quantities don't matter. I have been proved wrong entirely.

Don't get addicted to any one snack

Keep changing routines. Find newer healthy alternatives to add to your list of healthy munchies. And in my personal experience, munch on stuff you don't like too much. This might sound silly, but I recently read in a daily's Page 3 that a famous Bollywood star known for her fab figure, never hires good cooks. If the food is VERY GOOD, you automatically eat more. My best snack is roasted chana because I don't relish it too much. I'll lazily munch on a handful and say -Oh! I feel full! Or the ones that require a little more effort like grating or chopping veggies, because who'll want to do that all over for a second serving?

Take your own snack bag to the movie-hall

Any guesses why movie hall popcorns entice you? The smells beckon you as soon as you enter and the allurement wont stop until you rush to the counter, get your fill and finish the last morsel even before the trailers at the beginning of the movie are over. Why don't you feel the same about home-made popcorn from corn-kernels? Simple! You wouldn't dream to add that much butter. A large size popcorn probably has at least half a stick of butter and a bucket - well, I don't think you even want to imagine. So you can take your own little baggies filled with some nuts, dried fruits, something like a trail mix, that you'd chew and eat slowly. Focus on the movie so that you don't dip around into your partner's or your friend's goodies.

Like all good habits, this one takes a while to form. Whether you are a busy working person or a stay at home mom, you can make this work for you. Combine it with your tea-time ritual and watch your body thank you for it!

I'd love it if you shared your similar experiences with us. What is your idea of a healthy yet satisfying snack? Add to the list please!

If you live in India, I can share with you some of the real low-cal and healthy products available in most supermarkets here। Leave a comment or mail me and I shall be glad to help!

How to snack and lose weight

Posted by admin

I was exercising like a maniac, eating the right foods, no in between grazing and yet my weight refused to budge. Since I did not have too much to lose in the first place, it was all the more difficult. While I'd like to believe that I'm just a little short of a health freak, I didn't have a figure to match. When I went to a nutritionist with my concerns, the diet plan they drew out for me was so much more than what I was eating already. At least 4 meals a day, and the Ms. Cynical in me said - "Wow! That's generous! But will it work?"

Work it did and I am now almost close to the number I desire. And I not obsessed with it either. As a part of the weight loss tips that I plan to include here, snacking is one of them.


How snacking helps weight loss

A little something inbetween meals helps in two ways.

  1. Prevents your metabolism from dipping. A good BMR (basal metabolic rate) is very important to make sure your body keeps burning calories at its resting state. Prolonged periods for fasting (like skipping breakfast) will convince your body that something is wrong and it has to conserve as much as possible.
  2. Keeps your blood sugar at stable levels, hence prevents cravings.
  3. You are better prepared for dinner time. The 200 calorie odd snack will make sure you don't feel terribly hungry and ready to jump on everything on the table at dinner.

How snacking helps diabetics

Most busy executives start their day with hardly any breakfast, have a greasy office canteen lunch ( especially in India) at around 2 PM, some rounds of tea / coffee to sustain till they manage to get out and then prowl for some fried chips / munchies at around 9 PM with a heavy dinner at around 10.30 PM. The gap between 2 PM and 9 PM is the critical time where blood sugar takes a dive. Maintenance of sugar levels through out the day is essential to management of diabetes. Here's where snacking comes to the rescue. A fruit or a trail mix would be ideal to break the 2pm - 9 PM fast and stabilize sugar levels.

The snacker's grocery list

That's my secret list for you. Not too many exotic ingredients, nothing that you wouldn't find in your supermarket. If I get them in Mumbai, then you can find them in pretty much any other city.

Buy a pound of unroasted, unsalted peanuts. Roast them either in your microwave or stove top, cool and store in an airtight container. To snack on them, don't grab a bowlful. Take a handful, mix it with one each of finely chopped cucumber, tomato and onion (small sized). Squeeze half a lemon, sprinkle salt, cayenne pepper, coriander leaves and you have a crunchy, yummy peanut snack ready.

Do the same with the soy nuts and almonds, puffed rice or other soy products.

Any of the nuts can be bulked up by adding raw grated veggies and flavourings so that you don't eat too much of the high calorie nuts.

Snacking tips

The super-size culture is fast catching on in India too, and it started with the 2 Litre 2.5 Litre pet bottles of colas, never mind that the 500 ml is free! The Lays and the Kurkures followed suit and we are not surprised to see supersized people too.

No snacking from the bag

I'm sure if you are snacking for weight loss, you wouldn't even pass by the 'Chips' or 'Crisps' aisles. But this is true even for the healthy stuff like nuts or puffed soy snacks. Don't eat from the bag. Have the patience to remove it into a small bowl, mix it with the veggies & flavourings, keep it aside, lock /seal the bag, put it away, take your bowl to the living room and munch on it as if you would eat a gourmet meal. Savour, chew and eat. If quality of food matters, quantity matters even more. I was earlier of the opinion that if something is low-cal, healthy and good for me, quantities don't matter. I have been proved wrong entirely.

Don't get addicted to any one snack

Keep changing routines. Find newer healthy alternatives to add to your list of healthy munchies. And in my personal experience, munch on stuff you don't like too much. This might sound silly, but I recently read in a daily's Page 3 that a famous Bollywood star known for her fab figure, never hires good cooks. If the food is VERY GOOD, you automatically eat more. My best snack is roasted chana because I don't relish it too much. I'll lazily munch on a handful and say -Oh! I feel full! Or the ones that require a little more effort like grating or chopping veggies, because who'll want to do that all over for a second serving?

Take your own snack bag to the movie-hall

Any guesses why movie hall popcorns entice you? The smells beckon you as soon as you enter and the allurement wont stop until you rush to the counter, get your fill and finish the last morsel even before the trailers at the beginning of the movie are over. Why don't you feel the same about home-made popcorn from corn-kernels? Simple! You wouldn't dream to add that much butter. A large size popcorn probably has at least half a stick of butter and a bucket - well, I don't think you even want to imagine. So you can take your own little baggies filled with some nuts, dried fruits, something like a trail mix, that you'd chew and eat slowly. Focus on the movie so that you don't dip around into your partner's or your friend's goodies.

Like all good habits, this one takes a while to form. Whether you are a busy working person or a stay at home mom, you can make this work for you. Combine it with your tea-time ritual and watch your body thank you for it!

I'd love it if you shared your similar experiences with us. What is your idea of a healthy yet satisfying snack? Add to the list please!

If you live in India, I can share with you some of the real low-cal and healthy products available in most supermarkets here। Leave a comment or mail me and I shall be glad to help!

Friday Food Video - How to make naan bread

A Holi video at the end of this post specially for you to enjoy!


I felt so proud when I saw the Indian naan occupying place of pride in the supermarket shelves in London on my last visit and they were selling like hot cakes, or breads rather. When I bought a pack from the local Sainsburys and tried one piece, it tasted more like regular white bread with just a flatter, oval shape and some coriander sprinkled on the top. I was pretty disappointed.

The perfect naan is a kind of elusive delight.

Top 5 excuses for resorting to store bought naan bread are:

Oh! I don't have a tandoor!
It turns out too rubbery!
It came out like a crisp!
Too time consuming!
It's not meant to be made at home!

Many bloggers have demonstrated their beautiful naan making skills which inspired me to try them at home and boy, they were delicious. Just today, I came across this hugely popular video of making naan bread at home and Friday Food Videos is born.

For those who can't view the video below, click here.


So throw away the excuses and watch this beautiful video. You'll be the naan - queen (or king! ) in no time!

You could try our Egg curry or the Kaala Chana curry (North Indian black chick peas curry) along with the naan breads.

I want to share this soul-stirring video on Holi, do see it till the very end....and tell me what you thought of it!

Technorati tags: naan bread, Indian bread

Friday Food Video - How to make naan bread

Posted by admin

A Holi video at the end of this post specially for you to enjoy!


I felt so proud when I saw the Indian naan occupying place of pride in the supermarket shelves in London on my last visit and they were selling like hot cakes, or breads rather. When I bought a pack from the local Sainsburys and tried one piece, it tasted more like regular white bread with just a flatter, oval shape and some coriander sprinkled on the top. I was pretty disappointed.

The perfect naan is a kind of elusive delight.

Top 5 excuses for resorting to store bought naan bread are:

Oh! I don't have a tandoor!
It turns out too rubbery!
It came out like a crisp!
Too time consuming!
It's not meant to be made at home!

Many bloggers have demonstrated their beautiful naan making skills which inspired me to try them at home and boy, they were delicious. Just today, I came across this hugely popular video of making naan bread at home and Friday Food Videos is born.

For those who can't view the video below, click here.


So throw away the excuses and watch this beautiful video. You'll be the naan - queen (or king! ) in no time!

You could try our Egg curry or the Kaala Chana curry (North Indian black chick peas curry) along with the naan breads.

I want to share this soul-stirring video on Holi, do see it till the very end....and tell me what you thought of it!

Technorati tags: naan bread, Indian bread

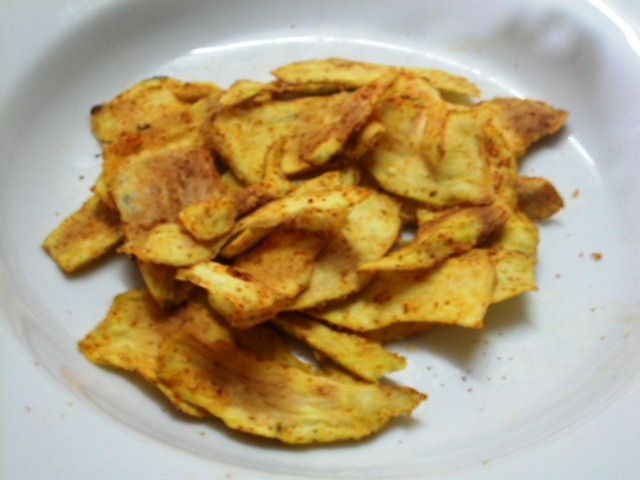
Almost fat free Sweet Potato Chips


This is more of a tip than a recipe. A tip to make chips without frying. I got this idea from the blog 28 Cooks where there was a post on Microtato Chips. The taste of my favourite brand of chips (when I was in US) was Terra - thick chips made from starchy vegetables - potatoes, sweet potatoes, beetroot etc. These were definitely deep fried, but since then I've been wanting to make sweet potato chips at home.
The Indian sweet potatoes are almost white from inside unlike the orange coloured ones I've seen in US. These are starchy and dense and hardly sweet to taste.

To make these chips, all you need is a sweet potato, some seasoning and a microwave oven. Peel the vegetable. Slice it with a mandolin or as thin as you can manage with a knife.

Spray it with some oil / Coat it evenly with a teaspoon of oil. Add salt, red chilli powder and a bit of turmeric and mix it thoroughly into the slices.

Arrange it in a single layer on a microwave safe dish, and nuke at high for 5-6 minutes. The time taken depends on the power of your machine and thickness of slices.

Cool for a while and enjoy!

You can do the same with any of the starchy vegetables.

I also tried a salt and pepper combo and that worked fine too.

Ah! The fun of eating chips without the guilt is a wonderful experience. Do try and let me know!

Almost fat free Sweet Potato Chips

Posted by admin


This is more of a tip than a recipe. A tip to make chips without frying. I got this idea from the blog 28 Cooks where there was a post on Microtato Chips. The taste of my favourite brand of chips (when I was in US) was Terra - thick chips made from starchy vegetables - potatoes, sweet potatoes, beetroot etc. These were definitely deep fried, but since then I've been wanting to make sweet potato chips at home.
The Indian sweet potatoes are almost white from inside unlike the orange coloured ones I've seen in US. These are starchy and dense and hardly sweet to taste.

To make these chips, all you need is a sweet potato, some seasoning and a microwave oven. Peel the vegetable. Slice it with a mandolin or as thin as you can manage with a knife.

Spray it with some oil / Coat it evenly with a teaspoon of oil. Add salt, red chilli powder and a bit of turmeric and mix it thoroughly into the slices.

Arrange it in a single layer on a microwave safe dish, and nuke at high for 5-6 minutes. The time taken depends on the power of your machine and thickness of slices.

Cool for a while and enjoy!

You can do the same with any of the starchy vegetables.

I also tried a salt and pepper combo and that worked fine too.

Ah! The fun of eating chips without the guilt is a wonderful experience. Do try and let me know!

How to make South Indian filter coffee


This is a long-intended post. Right since June when my in-laws were visiting us from Chennai. I've always loved the aroma of traditional filter Kaapi. I also have two filters jostling for space in my over-crowded cabinets. Just that I'm not an extremely well-planned person and I can't wait for the coffee to percolate in the morning, when I want my caffeine fix in a hurry. Also, my decoction would always be too watery, so much so that I could easily pour half a cup of decoction into half cup of milk and still it would never be as 'strong' as I'd like it to be.

I observed Mom-in-law's technique when she was here and it was some serious technique. Seriously good coffee in the end. That's how I make my coffee nowadays and I make sure if I want that coffee fix in the morning, I get out my percolator the previous night. Other days it's good old tea. Not that I love tea any less.


Mom-in-law's Filter Kaapi

~You'll need a traditional percolator which is made of 4 parts. You can read the details about it here and buy it too if you wish! A large one costs $15!


~Coffee powder-Well, I'm not the girl to buy coffee beans and grind it fresh. Store bought coffee powder is just fine. A fine grind is used with a small percentage of chicory mixed in. Mom-in-law's brand of choice is from Vimala Coffee works in Chennai.

~Use a clean filter. Remove the lid and umbrella. Put 2 heaped Tbsp of coffee powder per person and press it down with a spoon. Keep the umbella back and gently pour fresh water brought to a rolling boil over the umbrella in the top container.

~The water will percolate down slowly depending on the quantity of powder placed. 6-8 tbsp of coffee powder will take the decoction almost 6-8 hours to collect at the bottom. (So it's better done at night, to have your morning cuppa). If you've put a lot of coffee powder, you wouldn't have a chance to put enough water to percolate resulting in very concentrated but less quantity of decoction at the bottom. In this case once the decoction collects below, you can add more boiling water at the top to collect the concentrate 2-3 times.

~Just remember that the consequent collections wont be as concentrated as the earlier ones. You might want to collect the entire lot and mix it together to get an even concentration of the whole lot of decoction in the end.

To prepare coffee: In a tumbler (traditional steel glass) or a mug, take upto 3/4th level milk and add decoction with constant stirring to make a coffee to suit your liking, mild or strong. Add sugar if you wish. Enjoy the aroma as you take a sip of Madras culture.

Note:
In my opinion, filter kaapi must be drunk in a traditional tumbler-davaraa, and the coffee swished a couple of times between the two to produce delicious foam (norai) on the top. I don't think my mom-in-law approves of this though. The disadvantage being the coffee getting cold while swishing it around ;) It is called Meter-Kaapi in someUdupi hotels as the coffee is poured into the glass from a meter's height to produce maximum foam

I submit this for the fortnightly WBB event on my blog. Have your pick of breakfasts from the fare on the table but wash it down with a tumbler of deliciously hot and aromatic filter kaapi!

How to make South Indian filter coffee

Posted by admin


This is a long-intended post. Right since June when my in-laws were visiting us from Chennai. I've always loved the aroma of traditional filter Kaapi. I also have two filters jostling for space in my over-crowded cabinets. Just that I'm not an extremely well-planned person and I can't wait for the coffee to percolate in the morning, when I want my caffeine fix in a hurry. Also, my decoction would always be too watery, so much so that I could easily pour half a cup of decoction into half cup of milk and still it would never be as 'strong' as I'd like it to be.

I observed Mom-in-law's technique when she was here and it was some serious technique. Seriously good coffee in the end. That's how I make my coffee nowadays and I make sure if I want that coffee fix in the morning, I get out my percolator the previous night. Other days it's good old tea. Not that I love tea any less.


Mom-in-law's Filter Kaapi

~You'll need a traditional percolator which is made of 4 parts. You can read the details about it here and buy it too if you wish! A large one costs $15!


~Coffee powder-Well, I'm not the girl to buy coffee beans and grind it fresh. Store bought coffee powder is just fine. A fine grind is used with a small percentage of chicory mixed in. Mom-in-law's brand of choice is from Vimala Coffee works in Chennai.

~Use a clean filter. Remove the lid and umbrella. Put 2 heaped Tbsp of coffee powder per person and press it down with a spoon. Keep the umbella back and gently pour fresh water brought to a rolling boil over the umbrella in the top container.

~The water will percolate down slowly depending on the quantity of powder placed. 6-8 tbsp of coffee powder will take the decoction almost 6-8 hours to collect at the bottom. (So it's better done at night, to have your morning cuppa). If you've put a lot of coffee powder, you wouldn't have a chance to put enough water to percolate resulting in very concentrated but less quantity of decoction at the bottom. In this case once the decoction collects below, you can add more boiling water at the top to collect the concentrate 2-3 times.

~Just remember that the consequent collections wont be as concentrated as the earlier ones. You might want to collect the entire lot and mix it together to get an even concentration of the whole lot of decoction in the end.

To prepare coffee: In a tumbler (traditional steel glass) or a mug, take upto 3/4th level milk and add decoction with constant stirring to make a coffee to suit your liking, mild or strong. Add sugar if you wish. Enjoy the aroma as you take a sip of Madras culture.

Note:
In my opinion, filter kaapi must be drunk in a traditional tumbler-davaraa, and the coffee swished a couple of times between the two to produce delicious foam (norai) on the top. I don't think my mom-in-law approves of this though. The disadvantage being the coffee getting cold while swishing it around ;) It is called Meter-Kaapi in someUdupi hotels as the coffee is poured into the glass from a meter's height to produce maximum foam

I submit this for the fortnightly WBB event on my blog. Have your pick of breakfasts from the fare on the table but wash it down with a tumbler of deliciously hot and aromatic filter kaapi!

Beat the heat-Monthly mingle


I love iced tea. In fact I love tea in any form. A post solely dedicated to brewing good tea has been long on my mind, and it will come soon.


When Meeta asked us what would one do to beat the heat-my immediate answer was- a tall glass of chilled iced tea. In fact that's the drink I like to have best, when I come home after being outdoors in the harsh afternoon sun. In Mumbai, summers are pretty ruthless. We face the kind of temperatures everyday at which California reports a 100 deaths due to sunstrokes. May be Indians are genetically programmed to bear this kind of sun.

Ginger-Lemon Iced Tea

Ingredients-

One ginger-lemon tea bag, 5-6 cubes of ice, 1 Tbsp honey, 1 Tbsp lime juice, pinch of salt, 4-5 mint leaves finely chopped, 1/4 tsp freshly grated ginger

Boil 1/2 cup water. Steep the tea-bag in boiling water for 5 minutes. Take 5-6 ice cubes in a tall glass. Pour in the tea and other ingredients. Mix well.

Drink chilled.

Check out:

Some wonderful tea recipes in Darjeeling's Tea board of India website here. From basic brewing tips to exotic stuff like Thai iced tea, tea ice cream and almond tea, there's something to surprise you all.


Tags: , ,

Beat the heat-Monthly mingle

Posted by admin


I love iced tea. In fact I love tea in any form. A post solely dedicated to brewing good tea has been long on my mind, and it will come soon.


When Meeta asked us what would one do to beat the heat-my immediate answer was- a tall glass of chilled iced tea. In fact that's the drink I like to have best, when I come home after being outdoors in the harsh afternoon sun. In Mumbai, summers are pretty ruthless. We face the kind of temperatures everyday at which California reports a 100 deaths due to sunstrokes. May be Indians are genetically programmed to bear this kind of sun.

Ginger-Lemon Iced Tea

Ingredients-

One ginger-lemon tea bag, 5-6 cubes of ice, 1 Tbsp honey, 1 Tbsp lime juice, pinch of salt, 4-5 mint leaves finely chopped, 1/4 tsp freshly grated ginger

Boil 1/2 cup water. Steep the tea-bag in boiling water for 5 minutes. Take 5-6 ice cubes in a tall glass. Pour in the tea and other ingredients. Mix well.

Drink chilled.

Check out:

Some wonderful tea recipes in Darjeeling's Tea board of India website here. From basic brewing tips to exotic stuff like Thai iced tea, tea ice cream and almond tea, there's something to surprise you all.


Tags: , ,

How to nurse a half-broken tooth?

One of my molars has been in a perilous condition for a few weeks now.But my dentist phobia combined with general procrasination led to a half-broken dangling molar. I never expected that the tooth that survived the heavy grinding of 'murukku' and 'kadalai urundai' could succumb to a weakling like 'kurmura'.

Since this happened at 3 pm, I had to wait for a local dentist to open shop which would be around evening. As luck would have it, she doesn't practise evenings, without prior appointments. The appointment is scheduled for tomorrow morning. Friends, I need all the luck I can because a dental appointment almost feels like a walk to the gallows. (Biting my nails furiously). Fortunately there's no insurance hassle in the middle, I can just choose to go to anyone I fancy. Why this must feature on a food-blog one might wonder! But aren't teeth intimately related to food?

I've been on liquid diet so far, and any liquids just wont do. They have to be something that can keep me from missing food. (If my mom happens to read this she might mutter under her breath-"Had she kept some religious fasts-she would have been prepared for this! But when has the girl ever listened?"

Two simple recipes to sail through a half-broken tooth (Literally)

Wheat Flour Porridge

Dot a pan with ghee. Put 2 Tbsp of wheat flour in the pan and saute till nice and brown. It will smell so good that you'll think, "How come I didn't know wheat flour could smell so good?". Meanwhile dissolve a Tbsp of jaggery in some water. You can microwave the jaggery with some water for 30 seconds.
Mix one cup of skimmed milk into the jaggery solution. Add this to the golden wheat flour on a low flame and with constant stirring. Sprinkle some cardamom powder to this after the wheat flour is throroughly dissolved and free of lumps.
Add some more cold milk if it's too thick for your liking.

Tasted yum-I almost felt happy to be eating/drinking this.

When can you eat this?

Don't worry, you don't have to break a tooth to eat this wonderful porridge. You can have it for breakfast if you've run out of cereal. Read what I've written about 'Cereal' killers.
Actually this gives me the idea of keeping some roasted wheat flour in stock to make this porridge in a jiffy whenever i feel like it!

Apple honey shake-This was my dinner. But you can have it as a breakfast shake or a post-dinner soothing drink.

Chop a peeled and cored apple into small pieces. Put it in a blender. Add a cup of skimmed milk, a tbsp of honey and a pinch of cinnamon powder. Blend at high speed for 2 minutes, until the apple is completely mashed.
Pour ino a tall glass and drink immediately.
I guess adding protein powder to this one will make it more filling.


No pictures this time. The stuff above wasn't so picture-worthy. It's just slurp worthy.

Wish me luck for my dental appointment. (Luckily you see the typed word. Had you seen the written word, you'd see how I was shivering ;)


Tags-,

How to nurse a half-broken tooth?

Posted by admin

One of my molars has been in a perilous condition for a few weeks now.But my dentist phobia combined with general procrasination led to a half-broken dangling molar. I never expected that the tooth that survived the heavy grinding of 'murukku' and 'kadalai urundai' could succumb to a weakling like 'kurmura'.

Since this happened at 3 pm, I had to wait for a local dentist to open shop which would be around evening. As luck would have it, she doesn't practise evenings, without prior appointments. The appointment is scheduled for tomorrow morning. Friends, I need all the luck I can because a dental appointment almost feels like a walk to the gallows. (Biting my nails furiously). Fortunately there's no insurance hassle in the middle, I can just choose to go to anyone I fancy. Why this must feature on a food-blog one might wonder! But aren't teeth intimately related to food?

I've been on liquid diet so far, and any liquids just wont do. They have to be something that can keep me from missing food. (If my mom happens to read this she might mutter under her breath-"Had she kept some religious fasts-she would have been prepared for this! But when has the girl ever listened?"

Two simple recipes to sail through a half-broken tooth (Literally)

Wheat Flour Porridge

Dot a pan with ghee. Put 2 Tbsp of wheat flour in the pan and saute till nice and brown. It will smell so good that you'll think, "How come I didn't know wheat flour could smell so good?". Meanwhile dissolve a Tbsp of jaggery in some water. You can microwave the jaggery with some water for 30 seconds.
Mix one cup of skimmed milk into the jaggery solution. Add this to the golden wheat flour on a low flame and with constant stirring. Sprinkle some cardamom powder to this after the wheat flour is throroughly dissolved and free of lumps.
Add some more cold milk if it's too thick for your liking.

Tasted yum-I almost felt happy to be eating/drinking this.

When can you eat this?

Don't worry, you don't have to break a tooth to eat this wonderful porridge. You can have it for breakfast if you've run out of cereal. Read what I've written about 'Cereal' killers.
Actually this gives me the idea of keeping some roasted wheat flour in stock to make this porridge in a jiffy whenever i feel like it!

Apple honey shake-This was my dinner. But you can have it as a breakfast shake or a post-dinner soothing drink.

Chop a peeled and cored apple into small pieces. Put it in a blender. Add a cup of skimmed milk, a tbsp of honey and a pinch of cinnamon powder. Blend at high speed for 2 minutes, until the apple is completely mashed.
Pour ino a tall glass and drink immediately.
I guess adding protein powder to this one will make it more filling.


No pictures this time. The stuff above wasn't so picture-worthy. It's just slurp worthy.

Wish me luck for my dental appointment. (Luckily you see the typed word. Had you seen the written word, you'd see how I was shivering ;)


Tags-,

Save the coconut!


It probably is very easy to guess- but the way this one looks, I thought it would lead to some interesting guesses.

This post is going to be on Save the _______ ! Coming up soon...

LG and Lakshmi have guessed it right so far!


Being the health conscious one, I don't use much of coconut in my daily cooking. Whether coconut is good or bad for health, that's one controversy I'm not getting into, at this point of time. However, when I want to make that coconut chutney, or 'arachu vitta sambhar' (Sambhar with freshly ground masala) or use it for a garnish, I like to have fresh grated coconut on hand.

Since I use the coconut on the odd occasion, breaking open a whole coconut and using a few slivers leads to the rest of it getting spoilt (even when refrigerated). The other option is grating the whole thing and freezing in a box. This gets problematic when i need a bit of the stuff and I have to struggle with the whole big lot- break off a little and thaw.

I find that the following solution serves me best and may be it will suit you too!

1. Break off the shell by hitting it hard around the central circumference on a big stone or a stony edge.

2. Usually, it will break off into two halves. You can keep a bowl beneath, while breaking to collect the sweet coconut water. In some occasions, the shell may break off leaving the whole coconut inside intact (the way it is in the picture). In the latter, you will have to cut open the whole nut into two halves-collecting the coconut water in a bowl.

3. Grate the flesh, or cut it into big pieces and mill in a food processor.


4.Stuff the grated coconut into an ice tray as in the picture above. Leave overnight in the freezer.


5.Extract the coconut cubes and save them in a Ziploc bag in the deep freezer. Now you can have exactly as much fresh coconut as you want and yet save the rest.


6.Whenever you need some of this for a recipe, just remove the required number of cubes into a bowl and nuke them for 1 min in the defrost mode.


Some coconut delights~

coconut chutney

Coconut chutney


Choco cocont scones

Choco-coconut scones (Adapted from Meeta's Chunky chocolate scones )


cofee coconut rum cake


Coffee coconut rum cake- Adapted from Susan's Spicy coconut chai cake

I've got two questions for you. Would you call this a fruit, a vegetable or a nut? What's your favourite coconut recipe? Would love to hear from you !

This is my entry for Kalyn's Weekend Herb Blogging


Save the coconut!

Posted by admin


It probably is very easy to guess- but the way this one looks, I thought it would lead to some interesting guesses.

This post is going to be on Save the _______ ! Coming up soon...

LG and Lakshmi have guessed it right so far!


Being the health conscious one, I don't use much of coconut in my daily cooking. Whether coconut is good or bad for health, that's one controversy I'm not getting into, at this point of time. However, when I want to make that coconut chutney, or 'arachu vitta sambhar' (Sambhar with freshly ground masala) or use it for a garnish, I like to have fresh grated coconut on hand.

Since I use the coconut on the odd occasion, breaking open a whole coconut and using a few slivers leads to the rest of it getting spoilt (even when refrigerated). The other option is grating the whole thing and freezing in a box. This gets problematic when i need a bit of the stuff and I have to struggle with the whole big lot- break off a little and thaw.

I find that the following solution serves me best and may be it will suit you too!

1. Break off the shell by hitting it hard around the central circumference on a big stone or a stony edge.

2. Usually, it will break off into two halves. You can keep a bowl beneath, while breaking to collect the sweet coconut water. In some occasions, the shell may break off leaving the whole coconut inside intact (the way it is in the picture). In the latter, you will have to cut open the whole nut into two halves-collecting the coconut water in a bowl.

3. Grate the flesh, or cut it into big pieces and mill in a food processor.


4.Stuff the grated coconut into an ice tray as in the picture above. Leave overnight in the freezer.


5.Extract the coconut cubes and save them in a Ziploc bag in the deep freezer. Now you can have exactly as much fresh coconut as you want and yet save the rest.


6.Whenever you need some of this for a recipe, just remove the required number of cubes into a bowl and nuke them for 1 min in the defrost mode.


Some coconut delights~

coconut chutney

Coconut chutney


Choco cocont scones

Choco-coconut scones (Adapted from Meeta's Chunky chocolate scones )


cofee coconut rum cake


Coffee coconut rum cake- Adapted from Susan's Spicy coconut chai cake

I've got two questions for you. Would you call this a fruit, a vegetable or a nut? What's your favourite coconut recipe? Would love to hear from you !

This is my entry for Kalyn's Weekend Herb Blogging


A serving of culture- Coconut chutney

Say coconut and my associations are temples, Kerala, Udipi restaurants, Kozhakattai, coconut shell curtains at West Elm (couldn't ever take them off my mind), weaving coconut leaf mats, sweet coconut water and many many more..

Coconut shell curtains


There are probably more recipes for coconut chutney than the number of Indian Gods. It took several years for me to arrive at the recipe that my taste buds liked best. Not too watery, not too spicy and not too bland. There's nothing more incomplete than a plate of steaming hot idlis or crisp dosas without that perfect coconut chutney.


Ingredients:


Half a fresh coconut- Sliced off from the shell
3 tbsp dalia (Pottu kadalai)
2 green chillies
2 cloves garlic
10 fresh curry leaves
few sprigs of cilantro / coriander
Salt as per taste (1/2 - 1 tsp)
1/2 tsp oil, 5-6 curry leaves and 1/2 tsp mustard seeds for garnish


Directions:
1. Put all ingredients except garnish in a blender with 1/4 cup of water. Grind to a fine paste. Add 1-2 tbsp of water, if consistency is too thick. Remove into a small bowl.
2. Heat the oil in a pan. Add the mustard seeds and curry leaves. Once the seeds start popping, take pan off the flame and spoon the garnish onto the chutney.
3.Serve fresh with steaming hot idlis, dosas, uthapams, upma, medu vadais etc.


Notes
This recipe makes about one cup of chutney
Keep refrigerated . This stays fresh for 24-36 hours in the refrigerator.
The key to making this chutney taste best is to use the freshest possible coconut. The slightest stale taste from the coconut will completely spoil the chutney.

A serving of culture- Coconut chutney

Posted by admin

Say coconut and my associations are temples, Kerala, Udipi restaurants, Kozhakattai, coconut shell curtains at West Elm (couldn't ever take them off my mind), weaving coconut leaf mats, sweet coconut water and many many more..

Coconut shell curtains


There are probably more recipes for coconut chutney than the number of Indian Gods. It took several years for me to arrive at the recipe that my taste buds liked best. Not too watery, not too spicy and not too bland. There's nothing more incomplete than a plate of steaming hot idlis or crisp dosas without that perfect coconut chutney.


Ingredients:


Half a fresh coconut- Sliced off from the shell
3 tbsp dalia (Pottu kadalai)
2 green chillies
2 cloves garlic
10 fresh curry leaves
few sprigs of cilantro / coriander
Salt as per taste (1/2 - 1 tsp)
1/2 tsp oil, 5-6 curry leaves and 1/2 tsp mustard seeds for garnish


Directions:
1. Put all ingredients except garnish in a blender with 1/4 cup of water. Grind to a fine paste. Add 1-2 tbsp of water, if consistency is too thick. Remove into a small bowl.
2. Heat the oil in a pan. Add the mustard seeds and curry leaves. Once the seeds start popping, take pan off the flame and spoon the garnish onto the chutney.
3.Serve fresh with steaming hot idlis, dosas, uthapams, upma, medu vadais etc.


Notes
This recipe makes about one cup of chutney
Keep refrigerated . This stays fresh for 24-36 hours in the refrigerator.
The key to making this chutney taste best is to use the freshest possible coconut. The slightest stale taste from the coconut will completely spoil the chutney.

Milking the beans


Reading
Indira's post on Making soya milk at home was really inspiring.

I immediately asked our local grocer to send me a kilo of soya beans. I followed the instructions as per the post except for completely skinning all soaked beans. Firstly skins wouldn't come out too easily and the skins that did come off, would not float to the top. So I just managed to skin as much as I could.

It involved quite some time & effort-and generous splashes of the mixture all around my kitchen, but the end result very satisfying indeed.

Two cups of soya beans yielded over 1L of milk.

Guess what- I also got a bowl full of cholesterol free soy cream FREE! All from the 'malai' / 'aadai' that I kept collecting during the simmering stage. It shall be put to good use in some soup or curry.

I'm also left with a huge bowl full of sediment that was left behind after filtering. Its too soft and fluffy to throw away. Yet to think of something to do with it. Ideas anybody?

Thanks Indira!


Milking the beans

Posted by admin


Reading
Indira's post on Making soya milk at home was really inspiring.

I immediately asked our local grocer to send me a kilo of soya beans. I followed the instructions as per the post except for completely skinning all soaked beans. Firstly skins wouldn't come out too easily and the skins that did come off, would not float to the top. So I just managed to skin as much as I could.

It involved quite some time & effort-and generous splashes of the mixture all around my kitchen, but the end result very satisfying indeed.

Two cups of soya beans yielded over 1L of milk.

Guess what- I also got a bowl full of cholesterol free soy cream FREE! All from the 'malai' / 'aadai' that I kept collecting during the simmering stage. It shall be put to good use in some soup or curry.

I'm also left with a huge bowl full of sediment that was left behind after filtering. Its too soft and fluffy to throw away. Yet to think of something to do with it. Ideas anybody?

Thanks Indira!


How to make yogurt ?


Yogurt can be used to make dips, buttermilk ( Lassi / Chaas ), in gravies, side dishes like raitas, salad dressings... The list is endless. It's good to have a bowl of fresh yogurt in the refrigerator at all times!

Take 2 cups of boiled and cooled milk, or you may choose to heat up pasteurized milk until warm-hot in the microwave. Take a tsp of yogurt and mix it evenly in the warm milk and keep the mixture in an area free of air drafts. You could generally do this at night and leave the milk to sit out overnight.
Generally the transition from milk to yogurt takes about 5-6 hours, and even longer in colder climes. During cold weather, you can keep the vessel in the oven with the light on. The heat from the light hastens the procedure.

TIP


Add a small piece of green chilli slit at the center to the milk at the time of curdling to get really thick curds. Don’t know how it works, but it surely does!

How to make yogurt ?

Posted by admin


Yogurt can be used to make dips, buttermilk ( Lassi / Chaas ), in gravies, side dishes like raitas, salad dressings... The list is endless. It's good to have a bowl of fresh yogurt in the refrigerator at all times!

Take 2 cups of boiled and cooled milk, or you may choose to heat up pasteurized milk until warm-hot in the microwave. Take a tsp of yogurt and mix it evenly in the warm milk and keep the mixture in an area free of air drafts. You could generally do this at night and leave the milk to sit out overnight.
Generally the transition from milk to yogurt takes about 5-6 hours, and even longer in colder climes. During cold weather, you can keep the vessel in the oven with the light on. The heat from the light hastens the procedure.

TIP


Add a small piece of green chilli slit at the center to the milk at the time of curdling to get really thick curds. Don’t know how it works, but it surely does!

Masala Mor - Mildly spiced buttermilk for hot summers

My morning glass of chaas


Nothing like a glass of cool buttermilk to have with breakfast, or with a heavy weekend lunch, or just about anytime, especially if you live in a place like Bombay which has 3 seasons and all summer.


Though we do occasionally resort to opening a tetra pack of Masti Chaas (Amul), these days, I make a big pot of chaas first thing in the morning and keep it to cool in the fridge. Anytime we want something cooling, a glass of chilled masala mor (Mor is buttermilk in Tamil) is never far from hand.


I have heard of methods that make buttermilk by adding vinegar to milk and so on. In India, every family used to have a tradition of 'setting' dahi / thayir (yogurt) from milk every day, but this tradition is fast declining due to the convenience of store bought yogurt. Traditionally, in my grandmom's house, she would collect the creamy layer that was the top layer of yogurt made from whole milk, into a glass jar, every morning. This jar was kept in the fridge. When it became half full, she would add some lukewarm water to the jar, to make it 3/4th full and screw the lid tightly. The jar would be hand shaken for 5 minutes or so until the butter separated out on the top. This would be emptied into a bowl with some cold water, where the butter could be easily scooped up into a ball with the fingers and transferred to another bowl. The leftover liquid was the 'buttermilk'.


Since we don't get into the merry hassles of butter making (to help our sedentary lifestyles), we make buttermilk in a much simpler fashion. Take one part yogurt to 4-5 parts water, less or more water depending on how thick you want it to be.


Spices can be added depending on the mood. Just some crushed mint leaves and chaat masala is one of my favourites. The other being toasting a pinch of hing (asafoetida) and some mustard seeds in a spot of ghee, tossing the spluttered seeds into the buttermilk with some salt. I'm sharing with you below, the traditional Tamil way of preparing masala buttermilk.


Recipe for Masala Mor
Makes 4 small glasses
Recipe can be easily scaled up
Category - Indian summer drink, Coolant, Digestive drink
Serve along with any Indian meal


1. In a large bowl, whisk together one cup thick yogurt (preferably homemade or Greek at the most) with 5 cups water. Keep aside.


2. In a mortar, mash together a small bit of fresh ginger root, one small green chilli and some fresh coriander leaves with some sea salt or rock salt. Add this coarse paste to the buttermilk.


3. In a small saucepan, heat 1 tsp oil or ghee, and add 1/2 tsp mustard seeds, a few curry leaves and a pinch of asafoetida. Stir till the seeds splutter and transfer it into the buttermilk bowl.


4. Mix everything well. Check for salt. Serve chilled.


Masala Mor - Mildly spiced buttermilk for hot summers

Posted by admin

My morning glass of chaas


Nothing like a glass of cool buttermilk to have with breakfast, or with a heavy weekend lunch, or just about anytime, especially if you live in a place like Bombay which has 3 seasons and all summer.


Though we do occasionally resort to opening a tetra pack of Masti Chaas (Amul), these days, I make a big pot of chaas first thing in the morning and keep it to cool in the fridge. Anytime we want something cooling, a glass of chilled masala mor (Mor is buttermilk in Tamil) is never far from hand.


I have heard of methods that make buttermilk by adding vinegar to milk and so on. In India, every family used to have a tradition of 'setting' dahi / thayir (yogurt) from milk every day, but this tradition is fast declining due to the convenience of store bought yogurt. Traditionally, in my grandmom's house, she would collect the creamy layer that was the top layer of yogurt made from whole milk, into a glass jar, every morning. This jar was kept in the fridge. When it became half full, she would add some lukewarm water to the jar, to make it 3/4th full and screw the lid tightly. The jar would be hand shaken for 5 minutes or so until the butter separated out on the top. This would be emptied into a bowl with some cold water, where the butter could be easily scooped up into a ball with the fingers and transferred to another bowl. The leftover liquid was the 'buttermilk'.


Since we don't get into the merry hassles of butter making (to help our sedentary lifestyles), we make buttermilk in a much simpler fashion. Take one part yogurt to 4-5 parts water, less or more water depending on how thick you want it to be.


Spices can be added depending on the mood. Just some crushed mint leaves and chaat masala is one of my favourites. The other being toasting a pinch of hing (asafoetida) and some mustard seeds in a spot of ghee, tossing the spluttered seeds into the buttermilk with some salt. I'm sharing with you below, the traditional Tamil way of preparing masala buttermilk.


Recipe for Masala Mor
Makes 4 small glasses
Recipe can be easily scaled up
Category - Indian summer drink, Coolant, Digestive drink
Serve along with any Indian meal


1. In a large bowl, whisk together one cup thick yogurt (preferably homemade or Greek at the most) with 5 cups water. Keep aside.


2. In a mortar, mash together a small bit of fresh ginger root, one small green chilli and some fresh coriander leaves with some sea salt or rock salt. Add this coarse paste to the buttermilk.


3. In a small saucepan, heat 1 tsp oil or ghee, and add 1/2 tsp mustard seeds, a few curry leaves and a pinch of asafoetida. Stir till the seeds splutter and transfer it into the buttermilk bowl.


4. Mix everything well. Check for salt. Serve chilled.


Blogger templates. Proudly Powered by Blogger.
back to top