What's New Here?

Showing posts with label Snack time. Show all posts

Apple Pie Pancakes: Kid in the kitchen

Bear with me. More kiddie recipes coming your way. It's holiday time and I'm trying to combine my love for cooking, my son's gourmet palate and his endless two week long vacation to do something productive. I keep buying a kilo of apples each time, with intentions of making an apple pie. As the days progress, with my decreasing pie-making resolve, the apples start going into salads, with peanut butter for my snack or just hang around in the fruit basket until they die a slow death. 

Today, son and me, came up with this idea. So what if we don't make pie, we can make pie like pancakes. And that's how this came about. He helped chop the apples, measure out the ingredients and we made these together to the endless patter of "mummy, I will FLIP the pancakes. I love flipping."


It was so delicious and we nearly had a fork fight towards the end for the last bit. This makes a perfect holiday breakfast or an after school snack. Just keep the apples prepped and the batter prepared before they're back from school and two minutes is all it takes. I've made this a tad healthier by replacing part of the refined flour by whole wheat flour. Orange zest is entirely optional, but I believe it adds a lot of flavour to the mix. Use a fine grater to grate the skin of the orange, but not until you reach the white bitter part.


Apple Pie Pancakes
Makes 4 6" pancakes

Ingredients
1/2 cup refined flour
1/4 cup whole wheat flour
1/2 tsp baking powder
2 tbsp sugar
1/2 tsp cinnamon powder
1 pinch salt
1 cup milk
2 tsp white vinegar
2 large apples
1 tsp butter + some more to cook pancakes
1 tbsp sugar
1/2 tsp orange zest (optional)
1/2 tsp cinnamon powder

Directions
In a bowl, mix the flours, baking powder, sugar, salt, cinnamon powder with a whisk. Make a well, add the milk and vinegar. Gently mix together with a fork. Let this batter rest for 10 minutes.
Scrub the apples under running water. Core the apples and dice them into small pieces with skin. Heat 1 tsp butter in non stick pan. Add the diced apples, sugar, cinnamon powder, orange zest and toss them under low flame for 5 minutes or so, until apples are slightly soft and nicely golden.
Wipe the non stick skillet dry and place on medium heat, grease with some butter and pour a ladle full of batter. Don't spread it thin. Dot some butter around the pancake. When you see bubbles around the edges, it is time to flip over. Each side takes around 2 mins to cook and get golden, this depends on the thickness of your pancakes though.
Once done, remove on a plate and top with a layer of prepared apples. Fold over or serve as it is. Best eaten hot.

Apple Pie Pancakes: Kid in the kitchen

Posted by admin

Bear with me. More kiddie recipes coming your way. It's holiday time and I'm trying to combine my love for cooking, my son's gourmet palate and his endless two week long vacation to do something productive. I keep buying a kilo of apples each time, with intentions of making an apple pie. As the days progress, with my decreasing pie-making resolve, the apples start going into salads, with peanut butter for my snack or just hang around in the fruit basket until they die a slow death. 

Today, son and me, came up with this idea. So what if we don't make pie, we can make pie like pancakes. And that's how this came about. He helped chop the apples, measure out the ingredients and we made these together to the endless patter of "mummy, I will FLIP the pancakes. I love flipping."


It was so delicious and we nearly had a fork fight towards the end for the last bit. This makes a perfect holiday breakfast or an after school snack. Just keep the apples prepped and the batter prepared before they're back from school and two minutes is all it takes. I've made this a tad healthier by replacing part of the refined flour by whole wheat flour. Orange zest is entirely optional, but I believe it adds a lot of flavour to the mix. Use a fine grater to grate the skin of the orange, but not until you reach the white bitter part.


Apple Pie Pancakes
Makes 4 6" pancakes

Ingredients
1/2 cup refined flour
1/4 cup whole wheat flour
1/2 tsp baking powder
2 tbsp sugar
1/2 tsp cinnamon powder
1 pinch salt
1 cup milk
2 tsp white vinegar
2 large apples
1 tsp butter + some more to cook pancakes
1 tbsp sugar
1/2 tsp orange zest (optional)
1/2 tsp cinnamon powder

Directions
In a bowl, mix the flours, baking powder, sugar, salt, cinnamon powder with a whisk. Make a well, add the milk and vinegar. Gently mix together with a fork. Let this batter rest for 10 minutes.
Scrub the apples under running water. Core the apples and dice them into small pieces with skin. Heat 1 tsp butter in non stick pan. Add the diced apples, sugar, cinnamon powder, orange zest and toss them under low flame for 5 minutes or so, until apples are slightly soft and nicely golden.
Wipe the non stick skillet dry and place on medium heat, grease with some butter and pour a ladle full of batter. Don't spread it thin. Dot some butter around the pancake. When you see bubbles around the edges, it is time to flip over. Each side takes around 2 mins to cook and get golden, this depends on the thickness of your pancakes though.
Once done, remove on a plate and top with a layer of prepared apples. Fold over or serve as it is. Best eaten hot.

The secret to making fully loaded Nachos

It's been unbearably hot this month in Bangalore. And being the good girl I am, I have been focussing on making the most of the sun, such as sun drying tomatoes, making sun tea and getting my daily dose of vitamin D. 

Those who follow me on Instagram might have seen my gleeful updates on restarting my kitchen garden. We sowed a ton of seeds 3 weeks ago and each morning, I would take my coffee up there to talk to the little seedlings and watch each one come out from the soil and take head count (just kidding there!). As usual, I jumped too soon. There's this nut-job of a stray dog who climbs up on our terrace garden every single night and he has taken it as is life's singleminded motto to dig out every inch of soil in the garden, and along with it every thing that I sow. It is such heart ache for me that I cannot bear to step into the garden and see the mini earthquake unleashed by that 10 kilo dog. He sure was an earthmover in his previous birth! Now that I've vented my anger and frustration, I can get back to talking about good food things. 


Since the last few Fridays, I've been making a big platter of these fully loaded nachos for dinner. It's like a big salad with lots of veggies, beans, cheese and of course tortilla chips. If you get down to baking these chips, then you have a completely healthy, high fibre, high protein snack ready to serve for a house party. I plan to bake these chips in advance for this weekend.

This is the perfect party dish, easily scaled up. You can assemble these in smaller foil containers, sprinkle cheese and bake so it can be shared between two people. 

Preparing the beans:
These are not exactly refried beans because in the former, they are mashed to a coarse paste. Here the beans are pressure cooked until soft but each holding their shape and not mushy. They are then sautéed with some seasonings and kept aside for use in the nachos. You could  make these ahead of time and refrigerate up to 10 days in an airtight container.

Ingredients
1/2 cup raw rajma ( I use the smaller Kashmiri variety) 
pinch of baking soda
2 tsp olive oil
1 small onion, finely chopped
2 cloves garlic, finely minced
1 tsp cumin powder
1 chipotle chilli or a regular dried red chilli, finely chopped or 1/4 tsp chilli flakes
3/4 tsp salt or to taste
2 tbsp finely chopped coriander

Directions
Soak the rajma overnight with a pinch of baking soda.
Drain, wash well and add 1 cup water to this or enough water to completely immerse the beans in a utensil that goes inside the pressure cooker.
Pressure cook the beans for 10-12 minutes. (After two whistles, keep on sim for 10-12 minutes) The cooking time depends on the size of the rajma, for bigger sizes you may have to cook for slightly longer time. You want the beans to be cooked thoroughly, pressing with the back of the ladle or the thumb should mash it to a paste but it should hold its shape. Drain any excess water and keep aside.
In a heavy bottomed pan, heat the olive oil. Saute the onion and garlic with a pinch of salt until the onions are soft. Add the drained cooked rajma, cumin powder, chipotle, salt, coriander. On a low heat, gently saute and let all the seasonings coat the rajma for 5-7 minutes. Once this is done, keep aside until use.


Fully Loaded Nachos
Printable version here
Serves 4

Ingredients
200 grams Tortilla Chips - salted or flavoured (I use the salted variety of this brand and find them extremely crisp with good taste) 
1 big onion, finely chopped
2 medium tomatoes, deseeded and finely chopped
1 large green capsicum, deseeded and diced
1/4 cup cooked corn kernels (optional)
some sliced pickled jalapeño (how much or how little, depends on your preference)
1/2 cup grated cheddar cheese
1 cup of seasoned rajma beans (method above)
Fresh coriander, chopped

Directions
Preheat the oven to 200C. If you are using an OTG with heating coils on the top and bottom, make sure the top heating coil is on, for the cheese to melt.

In a large oven proof dish place half the chips in one layer. Top with half the onions, tomatoes, capsicum, corn, jalapeño, rajma and cheese. Place the remaining chips in a single layer over this and sprinkle all the remaining ingredients with coriander and half the cheese right on top.

Place this in a hot oven for 7-8 minutes until the cheese melts.
Remove from oven and eat right away. If serving young kids, make a small portion separately minus the jalapeños and use plain boiled and salted rajma in their dish.


Some tips:
Use fresh and crisp chips for a crispy crunchy dish.
Once you top with all vegetables, do not waste time. It needs to go into the oven immediately or the tomatoes will start making the chips soggy.
The more cheese you use, the more delicious it will be. Use a sharp tasting cheese for a tastier dish.
If you dont have an oven, this dish will taste good as it is, only the cheese wont be melted :)


The secret to making fully loaded Nachos

Posted by admin

It's been unbearably hot this month in Bangalore. And being the good girl I am, I have been focussing on making the most of the sun, such as sun drying tomatoes, making sun tea and getting my daily dose of vitamin D. 

Those who follow me on Instagram might have seen my gleeful updates on restarting my kitchen garden. We sowed a ton of seeds 3 weeks ago and each morning, I would take my coffee up there to talk to the little seedlings and watch each one come out from the soil and take head count (just kidding there!). As usual, I jumped too soon. There's this nut-job of a stray dog who climbs up on our terrace garden every single night and he has taken it as is life's singleminded motto to dig out every inch of soil in the garden, and along with it every thing that I sow. It is such heart ache for me that I cannot bear to step into the garden and see the mini earthquake unleashed by that 10 kilo dog. He sure was an earthmover in his previous birth! Now that I've vented my anger and frustration, I can get back to talking about good food things. 


Since the last few Fridays, I've been making a big platter of these fully loaded nachos for dinner. It's like a big salad with lots of veggies, beans, cheese and of course tortilla chips. If you get down to baking these chips, then you have a completely healthy, high fibre, high protein snack ready to serve for a house party. I plan to bake these chips in advance for this weekend.

This is the perfect party dish, easily scaled up. You can assemble these in smaller foil containers, sprinkle cheese and bake so it can be shared between two people. 

Preparing the beans:
These are not exactly refried beans because in the former, they are mashed to a coarse paste. Here the beans are pressure cooked until soft but each holding their shape and not mushy. They are then sautéed with some seasonings and kept aside for use in the nachos. You could  make these ahead of time and refrigerate up to 10 days in an airtight container.

Ingredients
1/2 cup raw rajma ( I use the smaller Kashmiri variety) 
pinch of baking soda
2 tsp olive oil
1 small onion, finely chopped
2 cloves garlic, finely minced
1 tsp cumin powder
1 chipotle chilli or a regular dried red chilli, finely chopped or 1/4 tsp chilli flakes
3/4 tsp salt or to taste
2 tbsp finely chopped coriander

Directions
Soak the rajma overnight with a pinch of baking soda.
Drain, wash well and add 1 cup water to this or enough water to completely immerse the beans in a utensil that goes inside the pressure cooker.
Pressure cook the beans for 10-12 minutes. (After two whistles, keep on sim for 10-12 minutes) The cooking time depends on the size of the rajma, for bigger sizes you may have to cook for slightly longer time. You want the beans to be cooked thoroughly, pressing with the back of the ladle or the thumb should mash it to a paste but it should hold its shape. Drain any excess water and keep aside.
In a heavy bottomed pan, heat the olive oil. Saute the onion and garlic with a pinch of salt until the onions are soft. Add the drained cooked rajma, cumin powder, chipotle, salt, coriander. On a low heat, gently saute and let all the seasonings coat the rajma for 5-7 minutes. Once this is done, keep aside until use.


Fully Loaded Nachos
Printable version here
Serves 4

Ingredients
200 grams Tortilla Chips - salted or flavoured (I use the salted variety of this brand and find them extremely crisp with good taste) 
1 big onion, finely chopped
2 medium tomatoes, deseeded and finely chopped
1 large green capsicum, deseeded and diced
1/4 cup cooked corn kernels (optional)
some sliced pickled jalapeño (how much or how little, depends on your preference)
1/2 cup grated cheddar cheese
1 cup of seasoned rajma beans (method above)
Fresh coriander, chopped

Directions
Preheat the oven to 200C. If you are using an OTG with heating coils on the top and bottom, make sure the top heating coil is on, for the cheese to melt.

In a large oven proof dish place half the chips in one layer. Top with half the onions, tomatoes, capsicum, corn, jalapeño, rajma and cheese. Place the remaining chips in a single layer over this and sprinkle all the remaining ingredients with coriander and half the cheese right on top.

Place this in a hot oven for 7-8 minutes until the cheese melts.
Remove from oven and eat right away. If serving young kids, make a small portion separately minus the jalapeños and use plain boiled and salted rajma in their dish.


Some tips:
Use fresh and crisp chips for a crispy crunchy dish.
Once you top with all vegetables, do not waste time. It needs to go into the oven immediately or the tomatoes will start making the chips soggy.
The more cheese you use, the more delicious it will be. Use a sharp tasting cheese for a tastier dish.
If you dont have an oven, this dish will taste good as it is, only the cheese wont be melted :)


Masala Vadai from a tea shop in Mannargudi : Guest post by Bharath M.

A few days ago, Nandini & Ajit, Bharath and me decided to cook up a mega Tambrahm feast for dinner. The menu was:
Cucumber Salad
Masala Vadai
Seppankizhangu
Roast
Cabbage Koottu
Radish arachuvitta Sambar
Jeera Rasam
Vetthakozhambu
Arisi Appalam

Banana Chips (from Hot Chips)
Curds
Rice
Semia Payasam
Out of this list of delicious items, it was Bharath's Masala Vadai that stood out. He got the batter ready at his place in the morning, refrigerated in his office and got it to my place by evening, where he fried the vadai fresh and served it with drinks. Such delicious vadais, I've never tasted. I pestered him enough to share the recipe, so I may do the first guest post ever, on my blog, in six years!


Bharath in the kitchen 


Bharath is a train enthusiast, an impulsive traveller, amazing photographer and a most evocative writer. Go through his blog Puri Subzi and you will know what I mean. And more than anything, he has grown to be a friend I can always depend on. And in his own words, he is a "Photographer of faces, writer of bus travels, driver of trains, lover of pongal, purveyor of seedy bars."


So here's Bharath's Masala Vadai for you, written in his own words...


Masala Vadai - Freshly fried


"...but this is against TamBrahm culture. How can you put onions and garlic in an aamavadai?", my amusement disguised as a protest.

"Sssh, this is not aamavadai. It's a masala vadai. The inspiration comes from some tea shop in Mannargudi", my mother's indignant voice peaking.

"You had masala vadai from a tea shop in Mannargudi?", I bait

"Please don't be so righteous. Everyone eats from weird places once in a while. Now shut up and tell me how it tastes"

Crisp. Light. Golden brown and d-e-l-c-i-o-u-s. "I am sold, ma, I am sold". That chubby grin finally shows itself.

It may be against TamBrahm way of life, but by god, this vadai is brilliant. Goes well with beer. Or a single malt.

Here's how you put it together (I've made a few changes to the basic recipe from my mother's original)


Ingredients

For the batter:
2 1/2 cups channa dal (soaked in slightly salted water for a good 4-5 hours)
1 teaspoon saunf (fennel seeds)
1/4 inch ginger
3 cloves of garlic
A generous pinch of black pepper powder

For the flavouring mix:
1/4 inch ginger, finely cut
2 cloves of garlic, finely cut
2 largish green chillis, finely cut
A handful of coriander and mint, coarsely cut
1 large red onion diced finely (2 if they are small to medium)
Salt to taste
A small pinch of red chilli powder (if you need the extra kick)


For the frying:
Some groundnut oil or rice bran oil.

Method


  1. Drain the water completely from the soaked channa dal. Dunk the, by now slightly soft, dal into a mixer along with the fennel seeds and the rest of batter ingredients. Add a tablespoon of water and start grinding. Initially for about 20 sec and then pulse 3 times for about 5 sec each. The batter by now should be quite coarse and the fennel, garlic, ginger and pepper incorporated. If the batter resembles a gooey paste, then you've gone too far. The ideal batter should have a mix of pulped dal, coarse dal and almost whole dal. Scoop out a bit in your hand - if it feels grainy and stony, then it's perfect.
  2. Transfer the batter to a large mixing bowl and refrigerate for 30 min.
  3. Chop all the flavouring mix ingredients according to the instructions above.
  4. Remove the batter from the fridge and all the flavour mix, except for the onions and salt. Let this now rest until you are ready to fry them up.
  5. 2-3 min before you ready to fry, add the onions and salt and give everything a thorough swirl.
  6. Heat the oil and drop a small roundel of the batter to test. If it raises to the top, the temperature is right and you can start.
  7. If you are comfortable patting the batter nice and thin, please do so, else shape it into small roundels. The later is much easier if you are doing all of this on your own!
  8. Fry until a nice golden brown.
Serve with either coconut or coarse coriander chutney.

Masala Vadai from a tea shop in Mannargudi : Guest post by Bharath M.

Posted by admin

A few days ago, Nandini & Ajit, Bharath and me decided to cook up a mega Tambrahm feast for dinner. The menu was:
Cucumber Salad
Masala Vadai
Seppankizhangu
Roast
Cabbage Koottu
Radish arachuvitta Sambar
Jeera Rasam
Vetthakozhambu
Arisi Appalam

Banana Chips (from Hot Chips)
Curds
Rice
Semia Payasam
Out of this list of delicious items, it was Bharath's Masala Vadai that stood out. He got the batter ready at his place in the morning, refrigerated in his office and got it to my place by evening, where he fried the vadai fresh and served it with drinks. Such delicious vadais, I've never tasted. I pestered him enough to share the recipe, so I may do the first guest post ever, on my blog, in six years!


Bharath in the kitchen 


Bharath is a train enthusiast, an impulsive traveller, amazing photographer and a most evocative writer. Go through his blog Puri Subzi and you will know what I mean. And more than anything, he has grown to be a friend I can always depend on. And in his own words, he is a "Photographer of faces, writer of bus travels, driver of trains, lover of pongal, purveyor of seedy bars."


So here's Bharath's Masala Vadai for you, written in his own words...


Masala Vadai - Freshly fried


"...but this is against TamBrahm culture. How can you put onions and garlic in an aamavadai?", my amusement disguised as a protest.

"Sssh, this is not aamavadai. It's a masala vadai. The inspiration comes from some tea shop in Mannargudi", my mother's indignant voice peaking.

"You had masala vadai from a tea shop in Mannargudi?", I bait

"Please don't be so righteous. Everyone eats from weird places once in a while. Now shut up and tell me how it tastes"

Crisp. Light. Golden brown and d-e-l-c-i-o-u-s. "I am sold, ma, I am sold". That chubby grin finally shows itself.

It may be against TamBrahm way of life, but by god, this vadai is brilliant. Goes well with beer. Or a single malt.

Here's how you put it together (I've made a few changes to the basic recipe from my mother's original)


Ingredients

For the batter:
2 1/2 cups channa dal (soaked in slightly salted water for a good 4-5 hours)
1 teaspoon saunf (fennel seeds)
1/4 inch ginger
3 cloves of garlic
A generous pinch of black pepper powder

For the flavouring mix:
1/4 inch ginger, finely cut
2 cloves of garlic, finely cut
2 largish green chillis, finely cut
A handful of coriander and mint, coarsely cut
1 large red onion diced finely (2 if they are small to medium)
Salt to taste
A small pinch of red chilli powder (if you need the extra kick)


For the frying:
Some groundnut oil or rice bran oil.

Method


  1. Drain the water completely from the soaked channa dal. Dunk the, by now slightly soft, dal into a mixer along with the fennel seeds and the rest of batter ingredients. Add a tablespoon of water and start grinding. Initially for about 20 sec and then pulse 3 times for about 5 sec each. The batter by now should be quite coarse and the fennel, garlic, ginger and pepper incorporated. If the batter resembles a gooey paste, then you've gone too far. The ideal batter should have a mix of pulped dal, coarse dal and almost whole dal. Scoop out a bit in your hand - if it feels grainy and stony, then it's perfect.
  2. Transfer the batter to a large mixing bowl and refrigerate for 30 min.
  3. Chop all the flavouring mix ingredients according to the instructions above.
  4. Remove the batter from the fridge and all the flavour mix, except for the onions and salt. Let this now rest until you are ready to fry them up.
  5. 2-3 min before you ready to fry, add the onions and salt and give everything a thorough swirl.
  6. Heat the oil and drop a small roundel of the batter to test. If it raises to the top, the temperature is right and you can start.
  7. If you are comfortable patting the batter nice and thin, please do so, else shape it into small roundels. The later is much easier if you are doing all of this on your own!
  8. Fry until a nice golden brown.
Serve with either coconut or coarse coriander chutney.

Arisi Upma - A breakfast in minutes

Steaming hot upma is served

This recipe is another example of how simple traditional Tamil Brahmin cuisine is. No frills, no laundry-list of ingredients and yet divine in taste.

In earlier times, rice rava used to be painstakingly prepared at home by picking, washing and draining the rice. It then used to be left to dry on layers of old muslin cloth in the shade. The rice would then be hand-pounded into a coarse powder. My mother and grandmother still follow the procedure except that in the last step, the food processor has replaced the hand-pounding. Thankfully. 


As much as I love traditions, I am deprived of this virtue called patience. My husband will tell you the same thing. So I pick this packet of readymade Idli Rava from the supermarket and that makes life a lot easier for me.


Idli rava / rice rava (rice that is broken into a coarse rava) is a very useful ingredient to have around the kitchen. It cooks in a jiffy compared to whole rice or regular rava (semolina). You can use this to make delicious Upma Kozhakattai - which is one of the lesser known Tamilian tiffin items that I have never seen in a restaurant menu. This was one of the earliest entries on this blog.

You can also soak this instead of rice to grind idli batter. A simple rice porridge can be prepared in minutes for your toddler at a moment's notice if you have idli rava at home. And of course this breakfast recipe that you can virtually make in the time your family takes to settle on the dining table. 

This makes a quick weekday breakfast. To make it a more sumptuous breakfast, serve it with sambar and a variety of chutneys.

The coconut oil used in this recipe gives a deep aroma to the upma, but it's not a must really. Use any other vegetable oil or ghee instead.

This is way faster than the regular upma because you need not roast the rava nor chop any chillies, ginger, onions etc. and this cooks in almost half the time as regular rava.

So you have no excuses not to try this out. Just make sure you add 'Idli Rava' to your grocery list the next time :)


Arisi Upma - Broken rice upma
Serves 3
Time taken - Under 10 minutes

Ingredients
1-2 tsp edible coconut oil
Small pinch of asafoetida
1/2 tsp mustard seeds
1-2 dried red chillies
1 tsp udad dal (ulutham paruppu)
1 sprig curry leaves (optional)
1 cup idli rava
3 cups water
1 tsp salt
1-2 tbsp scraped fresh coconut
1 small piece of jaggery
1/4 cup frozen peas (optional)

Directions
  1. In a large non stick kadai, heat the coconut oil.
  2. Stir in the asafoetida and splutter the mustard seeds. Add the udad dal and fry till lightly golden. Fry the curry leaves if using for a few seconds and the dried red chillies.
  3. Add 3 cups of water, salt, coconut scrapings, frozen green peas (if using) and jaggery. Let this come to a rolling boil.
  4. Reduce the flame to sim and add the idli rava while stirring constantly to avoid lumps.
  5. Cover with a tight fitting lid and cook until the water evaporates - this takes under 3-4 minutes. Give it a good stir. Check for salt. If you think the upma is too dry and the rice rava needs to be cooked some more, add few more tablespoons of water, cover and cook on low flame for 2-3 minutes more.
  6. Once this water is absorbed and the rava is cooked, turn off the flame. Keep covered for 2-3 minutes. This will make the grains absorb the moisture from the steam and fluff up some more.
  7. Serve hot garnished with some more fresh coconut if required.


Note:
  • The jaggery will not make this taste sweet, but according to my granny rice-rava has a slight bitter tinge about it which this jaggery will neutralize.
  • The original arisi upma recipe does not use peas. This is just to make it more filling and add to the protein content.
15 June 2010
Edited to add- Comment from my Dad on email after seeing this post:
Unnudaya uppumavai partha udaneye appdiye sappidanumbola irukku. Moreover, the garnishing is TOP. God bless you. Appa.
This made me so happy this morning :)

Arisi Upma - A breakfast in minutes

Posted by admin

Steaming hot upma is served

This recipe is another example of how simple traditional Tamil Brahmin cuisine is. No frills, no laundry-list of ingredients and yet divine in taste.

In earlier times, rice rava used to be painstakingly prepared at home by picking, washing and draining the rice. It then used to be left to dry on layers of old muslin cloth in the shade. The rice would then be hand-pounded into a coarse powder. My mother and grandmother still follow the procedure except that in the last step, the food processor has replaced the hand-pounding. Thankfully. 


As much as I love traditions, I am deprived of this virtue called patience. My husband will tell you the same thing. So I pick this packet of readymade Idli Rava from the supermarket and that makes life a lot easier for me.


Idli rava / rice rava (rice that is broken into a coarse rava) is a very useful ingredient to have around the kitchen. It cooks in a jiffy compared to whole rice or regular rava (semolina). You can use this to make delicious Upma Kozhakattai - which is one of the lesser known Tamilian tiffin items that I have never seen in a restaurant menu. This was one of the earliest entries on this blog.

You can also soak this instead of rice to grind idli batter. A simple rice porridge can be prepared in minutes for your toddler at a moment's notice if you have idli rava at home. And of course this breakfast recipe that you can virtually make in the time your family takes to settle on the dining table. 

This makes a quick weekday breakfast. To make it a more sumptuous breakfast, serve it with sambar and a variety of chutneys.

The coconut oil used in this recipe gives a deep aroma to the upma, but it's not a must really. Use any other vegetable oil or ghee instead.

This is way faster than the regular upma because you need not roast the rava nor chop any chillies, ginger, onions etc. and this cooks in almost half the time as regular rava.

So you have no excuses not to try this out. Just make sure you add 'Idli Rava' to your grocery list the next time :)


Arisi Upma - Broken rice upma
Serves 3
Time taken - Under 10 minutes

Ingredients
1-2 tsp edible coconut oil
Small pinch of asafoetida
1/2 tsp mustard seeds
1-2 dried red chillies
1 tsp udad dal (ulutham paruppu)
1 sprig curry leaves (optional)
1 cup idli rava
3 cups water
1 tsp salt
1-2 tbsp scraped fresh coconut
1 small piece of jaggery
1/4 cup frozen peas (optional)

Directions
  1. In a large non stick kadai, heat the coconut oil.
  2. Stir in the asafoetida and splutter the mustard seeds. Add the udad dal and fry till lightly golden. Fry the curry leaves if using for a few seconds and the dried red chillies.
  3. Add 3 cups of water, salt, coconut scrapings, frozen green peas (if using) and jaggery. Let this come to a rolling boil.
  4. Reduce the flame to sim and add the idli rava while stirring constantly to avoid lumps.
  5. Cover with a tight fitting lid and cook until the water evaporates - this takes under 3-4 minutes. Give it a good stir. Check for salt. If you think the upma is too dry and the rice rava needs to be cooked some more, add few more tablespoons of water, cover and cook on low flame for 2-3 minutes more.
  6. Once this water is absorbed and the rava is cooked, turn off the flame. Keep covered for 2-3 minutes. This will make the grains absorb the moisture from the steam and fluff up some more.
  7. Serve hot garnished with some more fresh coconut if required.


Note:
  • The jaggery will not make this taste sweet, but according to my granny rice-rava has a slight bitter tinge about it which this jaggery will neutralize.
  • The original arisi upma recipe does not use peas. This is just to make it more filling and add to the protein content.
15 June 2010
Edited to add- Comment from my Dad on email after seeing this post:
Unnudaya uppumavai partha udaneye appdiye sappidanumbola irukku. Moreover, the garnishing is TOP. God bless you. Appa.
This made me so happy this morning :)

Ajwaini Arbi ke Tikkey (Colocassia with carom seeds)


Arbi ke Tikkey


Arbi / Colocassia or seppankizhangu (in Tamil) can be an ugly looking vegetable...but lends itself to some delicious dishes. Ask those good Tamil boys who pester their wives to make Seppankizhangu roast for Sunday lunches, just the way their Amma makes it :) Even cricketer Srikkanth admits to being a "ghee-seppankizhangu roast-paruppu sadam freak". Seppankizhangu roast can be a topic for another whole post, but this one is dedicated to the Punju way of glorifying an ordinary muddy arbi.

A little note of warning, there are people who are allergic to some of these root vegetables, so please to check with your families if you are unleashing this fellow on them for the first time. If while handling this vegetable, your fingers itch, then you yourself may be allergic to this - anywhere from mild to severe. This is something extremely hilarious I read on one of my favourite blogs on allergic tendencies to vegetables from the yam family.

The inspiration for this recipe comes from our favourite Punju restaurant in the vicinity - Urban Tadka. This place does not take reservations and the only way to get a seat is to go there, put your name down on their long waiting list and be prepared to wait from anywhere between half hour to two hours. And its been some 3-4 years since they started, and people continue to WAIT with salivating tongues and rumbling tummies. That speaks for the yumminess quotient of the food they serve. So coming back to the Ajwaini Arbi Tikkas, this is one of our favourite starters here. Having eaten it a few times it was easy to figure out what went into it, well almost, two of the main ingredients already revealed in the name itself. My addition to this is sesame seeds which i did not find used in the restaurant version.

Arbi like some of its starchy cousins can produce considerable gas in your GIT (Gastro-Intestinal Tract) and ajwain or omam / carom seeds is an excellent spice to counteract the bloating, so these do make a perfect synergistic pair.


Ajwaini Arbi Ke Tikkey (Colocassia with carom seeds)
Category: Appetizer / Finger food / Roti accompaniment
Time taken: Active time: 10 minutes, Inactive time : 40 minutes
Serves 2


Preparation

This recipe uses 250 g or 1/2 Lb of colocassia. When you buy the arbi, try and choose the ones of a similar size so that they can cook uniformly.
First scrub the muddy bits from the arbi very well. I use the pressure cooker to cook them through.

Place the arbis in a cooker vessel with a little water (1/2 cup or so), more water in the cooker, after two whistles, place on sim for 5 minutes. This should do to cook medium sized arbis without turning them to mush, in which case, you really cannot progress further.

One the cooker has cooled, open, and remove the arbi to a plate and cool for 10 minutes till comfortable to peel.

Once peeled, place them in a single layer in a large dish. With your palms or a wooden masher, lightly flatten each piece until oval / round, but not with so much force that it crumbles.

Spices and other stuff

Over the arbi, sprinkle -
1 tsp coarsely crushed ajwain
1 tsp of red chilli powder (like degi mirch)
1 tbsp of coriander powder
1 tbsp of sesame seeds
1 tsp salt
1/4 tsp turmeric powder
1 tsp rice flour (for crispiness)
plenty of finely chopped coriander

With a gentle hand, coat the spices over the arbi and let this sit for 15 minutes minimum. You could also refrigerate the dish covered with cling wrap until the time you want to shallow fry and serve.

Final step

In a cast iron or any suitable skillet, heat 2 tbsp of vegetable oil. Place the well marinated arbi pieces in a single layer. Let these acquire a golden brown crust on one side (takes around 7-10 minutes) after which turn them over and crispen for 10 more minutes.

Serve hot with green chutney or a date tamarind chutney. We had it with store bought Date Tamarind Chutney (Kitchens of India, ITC) and it went superbly along with some slices of cool cucumber.

This is my entry to Meeta's Monthly Mingle - Bollywood Cooking.


Do check out another yummy sounding recipe for Colocassia posted by Raaga, we do have some kind of telepathy going. I received her mouthwatering and melt-in-your-mouth Nankhatais, along with a cooking paste and Mungodis from her in a courier that made my weekend. Needless to say the Nankhatais have been promptly devoured. Now i am so addicted to their taste, that I have to make some from her recipe this week. Thank you so much for the delicious stuff Raaga :)

Ajwaini Arbi ke Tikkey (Colocassia with carom seeds)

Posted by admin


Arbi ke Tikkey


Arbi / Colocassia or seppankizhangu (in Tamil) can be an ugly looking vegetable...but lends itself to some delicious dishes. Ask those good Tamil boys who pester their wives to make Seppankizhangu roast for Sunday lunches, just the way their Amma makes it :) Even cricketer Srikkanth admits to being a "ghee-seppankizhangu roast-paruppu sadam freak". Seppankizhangu roast can be a topic for another whole post, but this one is dedicated to the Punju way of glorifying an ordinary muddy arbi.

A little note of warning, there are people who are allergic to some of these root vegetables, so please to check with your families if you are unleashing this fellow on them for the first time. If while handling this vegetable, your fingers itch, then you yourself may be allergic to this - anywhere from mild to severe. This is something extremely hilarious I read on one of my favourite blogs on allergic tendencies to vegetables from the yam family.

The inspiration for this recipe comes from our favourite Punju restaurant in the vicinity - Urban Tadka. This place does not take reservations and the only way to get a seat is to go there, put your name down on their long waiting list and be prepared to wait from anywhere between half hour to two hours. And its been some 3-4 years since they started, and people continue to WAIT with salivating tongues and rumbling tummies. That speaks for the yumminess quotient of the food they serve. So coming back to the Ajwaini Arbi Tikkas, this is one of our favourite starters here. Having eaten it a few times it was easy to figure out what went into it, well almost, two of the main ingredients already revealed in the name itself. My addition to this is sesame seeds which i did not find used in the restaurant version.

Arbi like some of its starchy cousins can produce considerable gas in your GIT (Gastro-Intestinal Tract) and ajwain or omam / carom seeds is an excellent spice to counteract the bloating, so these do make a perfect synergistic pair.


Ajwaini Arbi Ke Tikkey (Colocassia with carom seeds)
Category: Appetizer / Finger food / Roti accompaniment
Time taken: Active time: 10 minutes, Inactive time : 40 minutes
Serves 2


Preparation

This recipe uses 250 g or 1/2 Lb of colocassia. When you buy the arbi, try and choose the ones of a similar size so that they can cook uniformly.
First scrub the muddy bits from the arbi very well. I use the pressure cooker to cook them through.

Place the arbis in a cooker vessel with a little water (1/2 cup or so), more water in the cooker, after two whistles, place on sim for 5 minutes. This should do to cook medium sized arbis without turning them to mush, in which case, you really cannot progress further.

One the cooker has cooled, open, and remove the arbi to a plate and cool for 10 minutes till comfortable to peel.

Once peeled, place them in a single layer in a large dish. With your palms or a wooden masher, lightly flatten each piece until oval / round, but not with so much force that it crumbles.

Spices and other stuff

Over the arbi, sprinkle -
1 tsp coarsely crushed ajwain
1 tsp of red chilli powder (like degi mirch)
1 tbsp of coriander powder
1 tbsp of sesame seeds
1 tsp salt
1/4 tsp turmeric powder
1 tsp rice flour (for crispiness)
plenty of finely chopped coriander

With a gentle hand, coat the spices over the arbi and let this sit for 15 minutes minimum. You could also refrigerate the dish covered with cling wrap until the time you want to shallow fry and serve.

Final step

In a cast iron or any suitable skillet, heat 2 tbsp of vegetable oil. Place the well marinated arbi pieces in a single layer. Let these acquire a golden brown crust on one side (takes around 7-10 minutes) after which turn them over and crispen for 10 more minutes.

Serve hot with green chutney or a date tamarind chutney. We had it with store bought Date Tamarind Chutney (Kitchens of India, ITC) and it went superbly along with some slices of cool cucumber.

This is my entry to Meeta's Monthly Mingle - Bollywood Cooking.


Do check out another yummy sounding recipe for Colocassia posted by Raaga, we do have some kind of telepathy going. I received her mouthwatering and melt-in-your-mouth Nankhatais, along with a cooking paste and Mungodis from her in a courier that made my weekend. Needless to say the Nankhatais have been promptly devoured. Now i am so addicted to their taste, that I have to make some from her recipe this week. Thank you so much for the delicious stuff Raaga :)

Simply Delicious Potato Wedges

This picture was used in the post 'Potatoes in Tambram cooking' even though it had no relation to it whatsoever, just because I thought these crunchy golden wedges looked so beautiful. And there was the promise for the recipe soon...which I was reminded non stop by my reader turned good friend Subashree. I sent her the recipe per email, but then when Anita poked me on this today, it was time to post it on the blog :)

I have always loved the wedges as against the fries, because they are chunky, the skins turn delicious and crispy and there's no frying involved. Last week, when we were in KL, we ordered a portion of wedges (for want of any other vegetarian options) at the premium coffee house cum diner, Dome and I haven't had them any worse. They were batter fried and cold which made me miss these home-made beauties. Also check here.

These are perfect when you and your spouse want to sack out watching the latest season of Simpsons or Ugly Betty. The day it poured cats and dogs in Bombay, we enjoyed this, with lots of ketchup, even if we had to suffer 'hot-potato-speech'.

We'll 2-3 big sized potatoes for two greedy people. Wash well scrubbing with a brush, because we plan to retain the skins. Bring 2-3 L of water to boil in a large vessel. Once water boils, drop in the whole potatoes and boil for 5-7 minutes, till they are half cooked (that's why not pressure cooking them). Remove and cool. Cut into half length wise and then into thick wedges.

Preheat oven at 200 C.

In a large dish, mix together 2 tbsp sesame seeds, 1/2 tsp red chilli powder / flakes, pinch of turmeric powder for extra golden colour, 1/2 tsp salt, crushed pepper and 2 tbsp olive oil / cooking oil. Transfer the potato wedges onto the dish and coat them evenly with spices.

Cover a baking sheet with foil / parchment paper, place the potato wedges on their bottoms (skin side down), sprinkle a pinch of coarse salt over the wedges. Bake for 15 minutes, until they are golden and crispy on the outside.

Eat as hot as your mouth can take :)

Health note

Oven baking these wedges makes them infinitely healthier than fries. They are chunkier hence more filling than the skinny fries. Keeping the skins on increases the fiber quotient, which is a great nutritional plus point.

Simply Delicious Potato Wedges

Posted by admin

This picture was used in the post 'Potatoes in Tambram cooking' even though it had no relation to it whatsoever, just because I thought these crunchy golden wedges looked so beautiful. And there was the promise for the recipe soon...which I was reminded non stop by my reader turned good friend Subashree. I sent her the recipe per email, but then when Anita poked me on this today, it was time to post it on the blog :)

I have always loved the wedges as against the fries, because they are chunky, the skins turn delicious and crispy and there's no frying involved. Last week, when we were in KL, we ordered a portion of wedges (for want of any other vegetarian options) at the premium coffee house cum diner, Dome and I haven't had them any worse. They were batter fried and cold which made me miss these home-made beauties. Also check here.

These are perfect when you and your spouse want to sack out watching the latest season of Simpsons or Ugly Betty. The day it poured cats and dogs in Bombay, we enjoyed this, with lots of ketchup, even if we had to suffer 'hot-potato-speech'.

We'll 2-3 big sized potatoes for two greedy people. Wash well scrubbing with a brush, because we plan to retain the skins. Bring 2-3 L of water to boil in a large vessel. Once water boils, drop in the whole potatoes and boil for 5-7 minutes, till they are half cooked (that's why not pressure cooking them). Remove and cool. Cut into half length wise and then into thick wedges.

Preheat oven at 200 C.

In a large dish, mix together 2 tbsp sesame seeds, 1/2 tsp red chilli powder / flakes, pinch of turmeric powder for extra golden colour, 1/2 tsp salt, crushed pepper and 2 tbsp olive oil / cooking oil. Transfer the potato wedges onto the dish and coat them evenly with spices.

Cover a baking sheet with foil / parchment paper, place the potato wedges on their bottoms (skin side down), sprinkle a pinch of coarse salt over the wedges. Bake for 15 minutes, until they are golden and crispy on the outside.

Eat as hot as your mouth can take :)

Health note

Oven baking these wedges makes them infinitely healthier than fries. They are chunkier hence more filling than the skinny fries. Keeping the skins on increases the fiber quotient, which is a great nutritional plus point.

Mushroom Tikkis flavoured with Nigella Seeds

Mushroom tikki sitting pretty on a whole wheat bun

Just as I am writing this, there are gusty winds blowing and it's starting to pour and instantly there is the unmistakable mitti ki khushboo or the sweet smell of the freshly drenched soil. The weather feels suddenly quite bearable and I am craving for a large masala chai. It rained like this the evening of the day before and wow this feels deliciously good, even if our dish TV antenna is failing to catch signals due to the crazy winds!

An ex-collegue and me had made afternoon plans to catch up but am I glad we cancelled it. There nothing as good as enjoying the rains from your balcony, even jutting your head out to catch the downpour & nothing as bad as getting stuck in the middle of the road , when every autowala worth his salt will refuse to take to anywhere. Can I see other Mumbaikars nodding their heads??

And hey, what a conincidence that I'm sharing with you perfect rainy season food, something chatpata and fun to have with spicy chai! This one is totally inspired by one of the recent episodes of Sanjeev Kapoor's Khana Khazana. My addition was mainly the Nigella seeds or Kalonji which imparted a strong fragrance to the tikkis.


That's the way aha aha I like it!

Mushroom tikki flavoured with Nigella seeds
Category: Finger food, quick dinner
Time taken: Under 30 minutes
Makes: 4 large tikkis


Ingredients:

1 tsp oil
1/4 tsp kalonji or Nigella Seeds
4 cloves garlic finely chopped

1 pack mushrooms, cleaned and quartered (to make 2 heaped cups or so)
1 medium potato, boiled, peeled and smashed
1 medium onion, finely chopped

1/2 tsp red chilli powder
1/4 tsp garam masala powder
1 tsp coriander powder
1 tsp salt
2 tbsp chopped coriander leaves

1/2 cup rava
1 tbsp oil or more for browning tikkis

Directions:

Boil the mushrooms in1/4 cup water or microwave on high for 4 minutes, till soft. Drain and cool. Grind this in a small jar into a coarse paste. You could also use a ricer to mash this. Keep aside.

In a non stick pan, heat 1 tsp oil. Sizzle the Nigella seeds in oil for a few seconds, add the chopped garlic. Saute for a brief while. Do not brown. Put it in the chopped onions with a pinch of salt and saute until soft and lightly browned. This will take around 3-4 minutes.

Next, add the coarsely ground mushrooms and stir for 3-4 minutes on high heat, till the mixture is dry. Remove into a bowl and cool for 5 minutes or so.

In the same bowl, add the smashed potatoes, remaining ingredients and season with salt to taste. Taste the mixture for salt and spices.

Spread the rava/semolina on a flat dish. Shape the mixture for the tikkis into thick rounds. I made 4 large tikkis from the above mentioned quantities. Handling them gently, coat on both sides with rava and shallow fry on a greased non-stick pan or grill for 3 minutes on each side till brown and crisp.

Serve in a burger bun or as it is with ketchup or chutney.


Notes:

Boiling and grinding the mushrooms brings out a lot of flavour from them and the nigella seeds are a powerhouse of taste. Less is more in this case and just 1/4 tsp keeps the oniony taste going throughout.

If you find the tikkis somewhat fragile to handle, then put it in the fridge for 30 minutes before shaping and browning. If that doesn't help either, add in some bread crumbs to the mixture.

Between starting this post and ending it, the rains have ceased and the sun is trying to come out once again to terrorise us :)

Since Tikkis are so Indian and there are two hearty vegetables in this one, I shall submit this for the T of Indian Vegetables at Nupur's!


Mushroom Tikkis flavoured with Nigella Seeds

Posted by admin

Mushroom tikki sitting pretty on a whole wheat bun

Just as I am writing this, there are gusty winds blowing and it's starting to pour and instantly there is the unmistakable mitti ki khushboo or the sweet smell of the freshly drenched soil. The weather feels suddenly quite bearable and I am craving for a large masala chai. It rained like this the evening of the day before and wow this feels deliciously good, even if our dish TV antenna is failing to catch signals due to the crazy winds!

An ex-collegue and me had made afternoon plans to catch up but am I glad we cancelled it. There nothing as good as enjoying the rains from your balcony, even jutting your head out to catch the downpour & nothing as bad as getting stuck in the middle of the road , when every autowala worth his salt will refuse to take to anywhere. Can I see other Mumbaikars nodding their heads??

And hey, what a conincidence that I'm sharing with you perfect rainy season food, something chatpata and fun to have with spicy chai! This one is totally inspired by one of the recent episodes of Sanjeev Kapoor's Khana Khazana. My addition was mainly the Nigella seeds or Kalonji which imparted a strong fragrance to the tikkis.


That's the way aha aha I like it!

Mushroom tikki flavoured with Nigella seeds
Category: Finger food, quick dinner
Time taken: Under 30 minutes
Makes: 4 large tikkis


Ingredients:

1 tsp oil
1/4 tsp kalonji or Nigella Seeds
4 cloves garlic finely chopped

1 pack mushrooms, cleaned and quartered (to make 2 heaped cups or so)
1 medium potato, boiled, peeled and smashed
1 medium onion, finely chopped

1/2 tsp red chilli powder
1/4 tsp garam masala powder
1 tsp coriander powder
1 tsp salt
2 tbsp chopped coriander leaves

1/2 cup rava
1 tbsp oil or more for browning tikkis

Directions:

Boil the mushrooms in1/4 cup water or microwave on high for 4 minutes, till soft. Drain and cool. Grind this in a small jar into a coarse paste. You could also use a ricer to mash this. Keep aside.

In a non stick pan, heat 1 tsp oil. Sizzle the Nigella seeds in oil for a few seconds, add the chopped garlic. Saute for a brief while. Do not brown. Put it in the chopped onions with a pinch of salt and saute until soft and lightly browned. This will take around 3-4 minutes.

Next, add the coarsely ground mushrooms and stir for 3-4 minutes on high heat, till the mixture is dry. Remove into a bowl and cool for 5 minutes or so.

In the same bowl, add the smashed potatoes, remaining ingredients and season with salt to taste. Taste the mixture for salt and spices.

Spread the rava/semolina on a flat dish. Shape the mixture for the tikkis into thick rounds. I made 4 large tikkis from the above mentioned quantities. Handling them gently, coat on both sides with rava and shallow fry on a greased non-stick pan or grill for 3 minutes on each side till brown and crisp.

Serve in a burger bun or as it is with ketchup or chutney.


Notes:

Boiling and grinding the mushrooms brings out a lot of flavour from them and the nigella seeds are a powerhouse of taste. Less is more in this case and just 1/4 tsp keeps the oniony taste going throughout.

If you find the tikkis somewhat fragile to handle, then put it in the fridge for 30 minutes before shaping and browning. If that doesn't help either, add in some bread crumbs to the mixture.

Between starting this post and ending it, the rains have ceased and the sun is trying to come out once again to terrorise us :)

Since Tikkis are so Indian and there are two hearty vegetables in this one, I shall submit this for the T of Indian Vegetables at Nupur's!


Bulgur patties - Crispy bulgur burgers

Regulars on my blog know that I have been cribbing endlessly about the heat in Bombay. I have almost forgotten how to make perfect round rotis, because it's clearly been a while since I made them. That doesn't mean I've been hogging rice for all my meals, which would have been the best thing to happen to me.

Bulgur
is called Lapsi or Dalia in India and it is the perfect substitute for rotis. After all, it is the same wheat in another form.We often eat this with traditional Tambram accompaniments like Sambhar, Koottu and even yogurt. With the strong flavours of the accompaniments, we hardly miss the rice. Since then, I have taken for granted that I can substitute lapsi for rice just about anywhere and get away with it. After having tried rice patties with left over rice in my early blogging days, this recipe came to my mind today. It's wheat plus veggies in one dish, served with a portion of salad and it is a whole meal without any slaving over the stove and sweating it out making rotis.

Ingredients
1 cup cooked bulgur (1/2 cup dried, medium grain)
1/2 cup grated carrots
1 chilli sliced
1 tbsp gram flour
1 tbsp semolina
1/2 tsp red chilli powder
1 tbsp chopped mint
1 tbsp chopped coriander leaves
Juice of a lime
1/2 tsp salt / to taste
Pinch of turmeric powder

Sliced shallots and thawed frozen peas for garnish

1 tbsp oil to grease pan

Directions

Mix all the ingredients in a bowl. Knead well to release flavours from spices and herbs. Refrigerate for 15 minutes or so.

Shape into patties of 3-4 cm diameter, about 1/2 inch thick.

Heat a non stick pan. Grease it with cooking oil.

Place 3-4 patties at a time on the medium hot skillet and let each side cook for about 3-4 minutes until crispy and brown.

Flip them over and let it cook for another 2-3 minutes.

Garnish with sliced shallots and serve hot.

Notes:
  • This can be served with a green salad as a light dinner.
  • These bulghur patties also make great finger food for a party, and hey no deep frying too!
  • If you don't mind wheat in wheat, then nothing can stop you from building a burger around these spicy, yummy beauties!
  • You can make the same recipe with left over rice. Take care that the rice isn't too dried out or the patties wont hold their shape. If the rice has turned dry, then you can sprinkle some water and microwave it for a minute until soft.
  • Since bulgur has a low glycemic index of 46, it is very good for diabetics as a substitute for rice. The high fiber and low GI causes gradual rise in blood sugar.
  • How to cook broken wheat? -Wash the bulghur well several times in running water in a colander. Soak it in 1 1/2 cups of hot water for 15 minutes. After this, you can microwave the bulghur in the same water for 3-4 minutes on HIGH or pressure cook until you hear one whistle. 1/2 cup dried broken wheat yields over a cup of cooked grain.
  • For difference between bulgur and cracked wheat, read here.

Bulgur patties - Crispy bulgur burgers

Posted by admin

Regulars on my blog know that I have been cribbing endlessly about the heat in Bombay. I have almost forgotten how to make perfect round rotis, because it's clearly been a while since I made them. That doesn't mean I've been hogging rice for all my meals, which would have been the best thing to happen to me.

Bulgur
is called Lapsi or Dalia in India and it is the perfect substitute for rotis. After all, it is the same wheat in another form.We often eat this with traditional Tambram accompaniments like Sambhar, Koottu and even yogurt. With the strong flavours of the accompaniments, we hardly miss the rice. Since then, I have taken for granted that I can substitute lapsi for rice just about anywhere and get away with it. After having tried rice patties with left over rice in my early blogging days, this recipe came to my mind today. It's wheat plus veggies in one dish, served with a portion of salad and it is a whole meal without any slaving over the stove and sweating it out making rotis.

Ingredients
1 cup cooked bulgur (1/2 cup dried, medium grain)
1/2 cup grated carrots
1 chilli sliced
1 tbsp gram flour
1 tbsp semolina
1/2 tsp red chilli powder
1 tbsp chopped mint
1 tbsp chopped coriander leaves
Juice of a lime
1/2 tsp salt / to taste
Pinch of turmeric powder

Sliced shallots and thawed frozen peas for garnish

1 tbsp oil to grease pan

Directions

Mix all the ingredients in a bowl. Knead well to release flavours from spices and herbs. Refrigerate for 15 minutes or so.

Shape into patties of 3-4 cm diameter, about 1/2 inch thick.

Heat a non stick pan. Grease it with cooking oil.

Place 3-4 patties at a time on the medium hot skillet and let each side cook for about 3-4 minutes until crispy and brown.

Flip them over and let it cook for another 2-3 minutes.

Garnish with sliced shallots and serve hot.

Notes:
  • This can be served with a green salad as a light dinner.
  • These bulghur patties also make great finger food for a party, and hey no deep frying too!
  • If you don't mind wheat in wheat, then nothing can stop you from building a burger around these spicy, yummy beauties!
  • You can make the same recipe with left over rice. Take care that the rice isn't too dried out or the patties wont hold their shape. If the rice has turned dry, then you can sprinkle some water and microwave it for a minute until soft.
  • Since bulgur has a low glycemic index of 46, it is very good for diabetics as a substitute for rice. The high fiber and low GI causes gradual rise in blood sugar.
  • How to cook broken wheat? -Wash the bulghur well several times in running water in a colander. Soak it in 1 1/2 cups of hot water for 15 minutes. After this, you can microwave the bulghur in the same water for 3-4 minutes on HIGH or pressure cook until you hear one whistle. 1/2 cup dried broken wheat yields over a cup of cooked grain.
  • For difference between bulgur and cracked wheat, read here.

Black Eyed Peas Burgers - KBC & SRK

Food news from India
We are finally seeing some quality food shows on the Indian tele scene. Madhur Jaffrey's flavours of India is fun to watch. Kylie Kwong on Discovery Travel & Living provides us that touch of exotica with her two shows - Cooking with heart and soul and Simply Magic. Now, the 'hostess with the mostess' - Nigella Lawson is finally on Indian tellies with her show Nigella Feasts, Mondays 8.30 pm.


Ever since I tried making burgers with the leftover dried Kaala Chana (brown chick peas) a few weeks ago, we make sure we have a Rachael Ray-esque burger night atleast once a week. Since we are vegetarians, I must say we have a WIDE variety of options to try out. Veggie-burgers, lentil burgers, soy burgers, I can go on and on and on.

The Kaala Chana burgers tasted excellent. Hubby loved them when stuffed between two slices of whole grain bread and grilled on my newly acquired grill pan with a dab of Olivio. This bunch, made with black eyed peas, looked similar but tasted totally different. The process is simple. Soak the beans, pressure cook/ cook, drain, mash. Then add any spices and flavours you fancy, shape them into good sized hunks, bake or grill them and you are good to go.


There are many ways to use them too-
  • Make a simple salad with pickled onions, tomato, carrots. Scoop it on a slice of bread, place the burger, drizzle your favourite sauces, cover with another slice and dinner is ready.
  • You can even deep fry smaller sized balls to make yummy finger food.
  • You can do a bean salad with these, by cutting the burgers into strips and tossing them with chopped peppers, onions, tomato and a light dressing of lemon juice, salt and pepper.


Black eyed peas burgers
Category: Dinner, Snack, Vegetarian burgers, TV Dinners
Prep time: Soaking time for peas - 6 hrs or overnight
Cooking time: 1 hr
Makes 12 medium sized burgers


ingredients
1.5 cups of black eyed peas - soaked overnight
3-4 tbsp of coriander leaves - chopped
1-2 tsp of cayenne pepper powder (as per your taste)
1-2 tsp of salt
1 tsp of cumin powder
5 cloves garlic finely chopped
1-2 tbsp of roasted sesame seeds
oil to brush on the burgers

for assembly
slices of bran or whole wheat bread / burger buns
a cup of onion slices pickled in vinegar and salt
a cup of sliced tomatoes
a cup of grated carrots / cabbage
coriander chutney (optional)
sauces of your choice - I used the Mexican chilli sauce (Medium hot salsa picanta) and the green Salsa Habanera (made from the hottest chillies in the world)

directions

Pressure cook the soaked peas in 4 cups of water for 2 whistles. Keep at sim for 5 min. Switch off cooker. Cool and drain well.
OR
Cook them in boiling water for 35-40 minutes until soft but not fully mashed.

Preheat the oven at 200 C or heat your grill pan.

Place the drained peas with the other ingredients for the burgers except oil in a bowl. Mash gently with a fork mixing all ingredients well. Taste for salt and spice.

Shape into burgers 2" in diameter. Place on a greased baking sheet. Brush the tops with oil and bake for 15 minutes. You could grill them on a stove top pan or a grill, as per your convenience.

Assemble each burger between two slices of bread and the salad with a choice of sauces. Enjoy warm with a cold drink of your choice. If you use the hot sauces I did, then trust me, you'll need it.

Serve it on a tray - and hey don't forget the remote. With ShahRukh Khan hosting Kaun Banega Crorepati (Indian version of Who wants to be millionaire?) TV dinners are here again.

Technorati tags: , , , ,

Black Eyed Peas Burgers - KBC & SRK

Posted by admin

Food news from India
We are finally seeing some quality food shows on the Indian tele scene. Madhur Jaffrey's flavours of India is fun to watch. Kylie Kwong on Discovery Travel & Living provides us that touch of exotica with her two shows - Cooking with heart and soul and Simply Magic. Now, the 'hostess with the mostess' - Nigella Lawson is finally on Indian tellies with her show Nigella Feasts, Mondays 8.30 pm.


Ever since I tried making burgers with the leftover dried Kaala Chana (brown chick peas) a few weeks ago, we make sure we have a Rachael Ray-esque burger night atleast once a week. Since we are vegetarians, I must say we have a WIDE variety of options to try out. Veggie-burgers, lentil burgers, soy burgers, I can go on and on and on.

The Kaala Chana burgers tasted excellent. Hubby loved them when stuffed between two slices of whole grain bread and grilled on my newly acquired grill pan with a dab of Olivio. This bunch, made with black eyed peas, looked similar but tasted totally different. The process is simple. Soak the beans, pressure cook/ cook, drain, mash. Then add any spices and flavours you fancy, shape them into good sized hunks, bake or grill them and you are good to go.


There are many ways to use them too-
  • Make a simple salad with pickled onions, tomato, carrots. Scoop it on a slice of bread, place the burger, drizzle your favourite sauces, cover with another slice and dinner is ready.
  • You can even deep fry smaller sized balls to make yummy finger food.
  • You can do a bean salad with these, by cutting the burgers into strips and tossing them with chopped peppers, onions, tomato and a light dressing of lemon juice, salt and pepper.


Black eyed peas burgers
Category: Dinner, Snack, Vegetarian burgers, TV Dinners
Prep time: Soaking time for peas - 6 hrs or overnight
Cooking time: 1 hr
Makes 12 medium sized burgers


ingredients
1.5 cups of black eyed peas - soaked overnight
3-4 tbsp of coriander leaves - chopped
1-2 tsp of cayenne pepper powder (as per your taste)
1-2 tsp of salt
1 tsp of cumin powder
5 cloves garlic finely chopped
1-2 tbsp of roasted sesame seeds
oil to brush on the burgers

for assembly
slices of bran or whole wheat bread / burger buns
a cup of onion slices pickled in vinegar and salt
a cup of sliced tomatoes
a cup of grated carrots / cabbage
coriander chutney (optional)
sauces of your choice - I used the Mexican chilli sauce (Medium hot salsa picanta) and the green Salsa Habanera (made from the hottest chillies in the world)

directions

Pressure cook the soaked peas in 4 cups of water for 2 whistles. Keep at sim for 5 min. Switch off cooker. Cool and drain well.
OR
Cook them in boiling water for 35-40 minutes until soft but not fully mashed.

Preheat the oven at 200 C or heat your grill pan.

Place the drained peas with the other ingredients for the burgers except oil in a bowl. Mash gently with a fork mixing all ingredients well. Taste for salt and spice.

Shape into burgers 2" in diameter. Place on a greased baking sheet. Brush the tops with oil and bake for 15 minutes. You could grill them on a stove top pan or a grill, as per your convenience.

Assemble each burger between two slices of bread and the salad with a choice of sauces. Enjoy warm with a cold drink of your choice. If you use the hot sauces I did, then trust me, you'll need it.

Serve it on a tray - and hey don't forget the remote. With ShahRukh Khan hosting Kaun Banega Crorepati (Indian version of Who wants to be millionaire?) TV dinners are here again.

Technorati tags: , , , ,

Spicy Khajas & Nankhatai in Diwali Blogging - Part I

Festival of lights
Continuing from here....
Cleaning is half-way through and home is already looking beautiful. For most Hindus, Diwali is a wonderful excuse to spruce up the house, discard old unused stuff, bring in new little ideas and ofcourse make delicious food to share with loved ones.
I truly believe that old unused stuff brings in a stagnant negative energy. Simply getting a few new things and throwing away all the junk can makeover your home and bring in the positive energy. Gone are the days of whitewashing each Diwali - thanks to the expenditures involved and 'who-has-the-time'! For starters - just hanging up new curtains over the gleaming panes is making my bedroom look brand new and spacious. Here's what I've been upto...

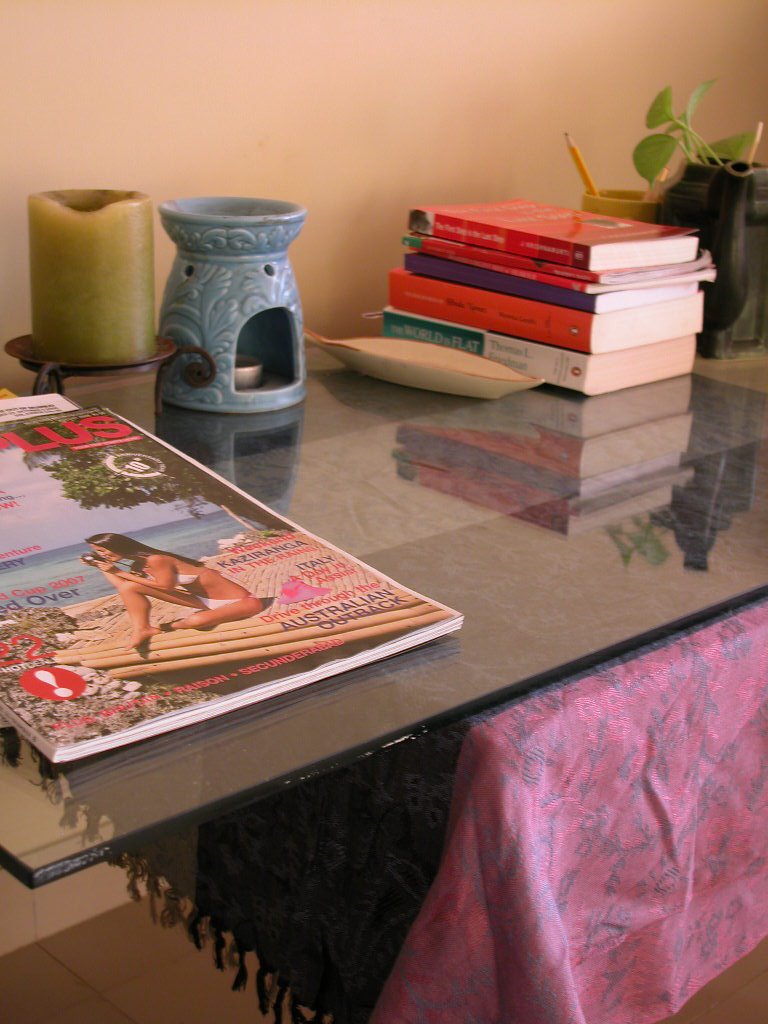
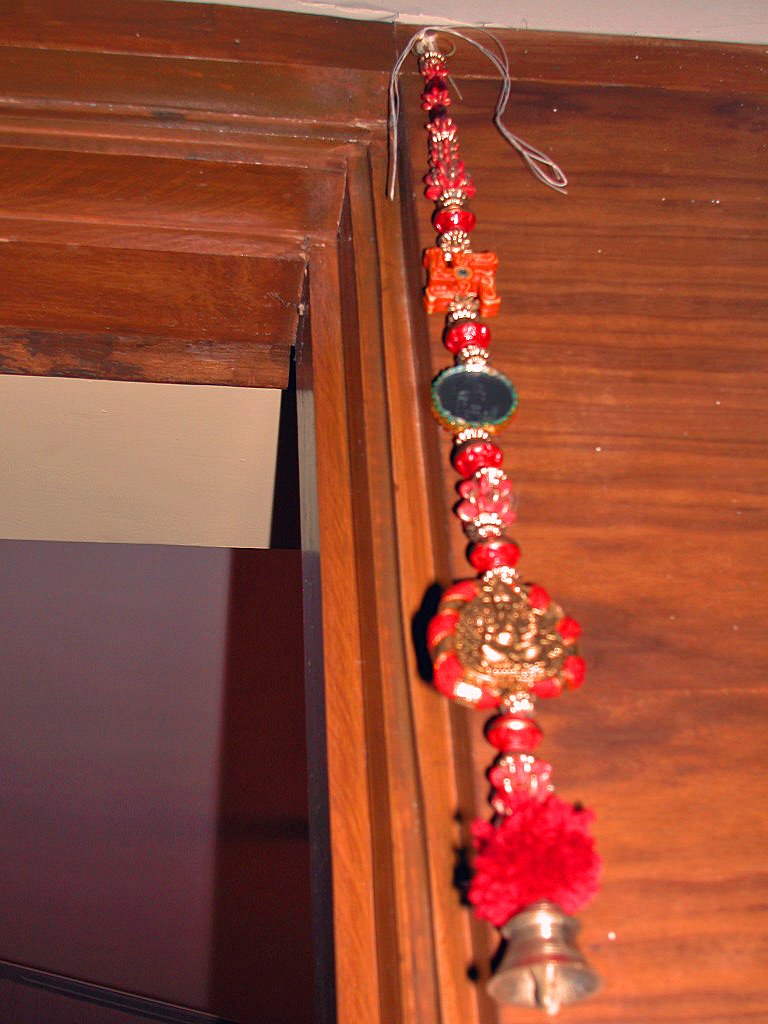
Improvised side-table Livening up the indoors Festive thoran

- Panes have been scrubbed clean, enough for accident-prone me to walk into them

- Organised the kitchen cabinets well enough to find the right pots and pans in a jiffy

- Gave away stuff that we haven't used in the last 6 months

- Bought nice earthern lamps painted red and a red thoran to hang outside our door

- Also improvised on a boring, black side-table to make it colourful and bigger (Read as hold more junk)

- Brought in my favourite areca nut palm plant indoors to liven up the living space

Cut to our favourite topic - FOOD

I've been wanting to try Nankhatai - our goold ol' Indian cookie for quite some time. Doing a blog search on the same lead me to some blogger recipes for this cookie. Here are the recipes for the same:

Jyotsna's Nankhatais from Pune

Krithika making Nankhatais Jyotsna's style

Manasi's Plain Jane cookies - A cook @ heart

Vaishali's Narayan Kataar Naankhatai

After a great deal of blog hopping, I finally settled for Manasi's recipe with a bit of modification in technique.

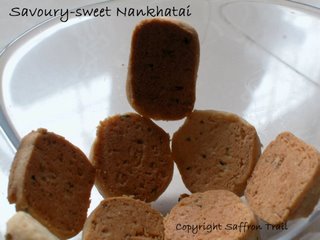
I rolled the dough in cling film, chilled them and cut them into slices instead of rolling them into balls. I actually reduced the sugar to 1/4th cup and added a pinch of salt with coarsely powdered fennel seeds. It was a salty sweet version that will appeal to the sweet-lover as well as the savoury-lover.


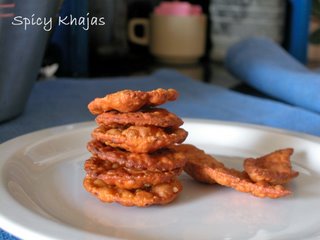
Spicy Khajas (Recipe adapted from bawarchi.com)

Deep fried savoury crisps

Type - Festival Food, Indian Snack

Time taken - Around one hour including drying time


Ingredients:

1 cup gram flour (besan)

1/4 cup all purpose flour (maida)

1 tsp red chilli powder

1/2 tsp carom seeds and 1/2 tsp cumin seeds - roasted and crushed

Salt to taste - roughly 3/4 tsp

1 tbsp oil

Oil for frying ( Iused Saffola losorb)

Method:

1. Mix the flours with salt and spices.

2. Add water little by little to make a smooth and pliable dough. Knead with one tbsp oil into a smooth ball.

3. Divide into 4 big balls. Spread each ball into a big round (less than 1/2 cm thin). You can cut this into desired shapes. Prick both sides of all pieces with a fork.

4. Dry out the cut out pieces on a clean kitchen towel. Repeat the same process for the other 3 balls. Dry out the pieces for 20 minutes or so on the towel like shown in the picture below.

5. Heat about 1.5 cups of oil in a kadai. (use the one you prefer for deep frying)

Dried and ready to be fried

6. You can decide if the oil is hot enough by putting a small piece of dough. If it rises to the top immediately, the oil is ready.

7. Put the cut out pieces in batches and fry till golden brown on a medium flame. Drain excess oil on kitchen tissues. Store in airtight container.

This is my entry for the Special Edition Jihva hosted by Vee of Past, Present, Me.

Note:

You can add any of your favourite spices like black pepper, sesame seeds etc. to the dough. The original recipe asked for the dough to be rolled into small puris, but I found my method more practical.

Tags:

, , , , , ,,

-----------------------------------------------

Just reminding you about Weekend Breakfast Blogging - the theme for this month is Twist in the Plate. Did you jazz up an ordinary breakfast for Diwali? Did you try your favourite blogger's recipe with your own twist? Did you turn a sweet one into a savoury one?

Come on, share it with us. You have time till 29th of this month to send me your entries. WBB turns monthly and theme-based this month onwards. Read more about it here.

Spicy Khajas & Nankhatai in Diwali Blogging - Part I

Posted by admin

Festival of lights
Continuing from here....
Cleaning is half-way through and home is already looking beautiful. For most Hindus, Diwali is a wonderful excuse to spruce up the house, discard old unused stuff, bring in new little ideas and ofcourse make delicious food to share with loved ones.
I truly believe that old unused stuff brings in a stagnant negative energy. Simply getting a few new things and throwing away all the junk can makeover your home and bring in the positive energy. Gone are the days of whitewashing each Diwali - thanks to the expenditures involved and 'who-has-the-time'! For starters - just hanging up new curtains over the gleaming panes is making my bedroom look brand new and spacious. Here's what I've been upto...

Improvised side-table Livening up the indoors Festive thoran

- Panes have been scrubbed clean, enough for accident-prone me to walk into them

- Organised the kitchen cabinets well enough to find the right pots and pans in a jiffy

- Gave away stuff that we haven't used in the last 6 months

- Bought nice earthern lamps painted red and a red thoran to hang outside our door

- Also improvised on a boring, black side-table to make it colourful and bigger (Read as hold more junk)

- Brought in my favourite areca nut palm plant indoors to liven up the living space

Cut to our favourite topic - FOOD

I've been wanting to try Nankhatai - our goold ol' Indian cookie for quite some time. Doing a blog search on the same lead me to some blogger recipes for this cookie. Here are the recipes for the same:

Jyotsna's Nankhatais from Pune

Krithika making Nankhatais Jyotsna's style

Manasi's Plain Jane cookies - A cook @ heart

Vaishali's Narayan Kataar Naankhatai

After a great deal of blog hopping, I finally settled for Manasi's recipe with a bit of modification in technique.

I rolled the dough in cling film, chilled them and cut them into slices instead of rolling them into balls. I actually reduced the sugar to 1/4th cup and added a pinch of salt with coarsely powdered fennel seeds. It was a salty sweet version that will appeal to the sweet-lover as well as the savoury-lover.


Spicy Khajas (Recipe adapted from bawarchi.com)

Deep fried savoury crisps

Type - Festival Food, Indian Snack

Time taken - Around one hour including drying time


Ingredients:

1 cup gram flour (besan)

1/4 cup all purpose flour (maida)

1 tsp red chilli powder

1/2 tsp carom seeds and 1/2 tsp cumin seeds - roasted and crushed

Salt to taste - roughly 3/4 tsp

1 tbsp oil

Oil for frying ( Iused Saffola losorb)

Method:

1. Mix the flours with salt and spices.

2. Add water little by little to make a smooth and pliable dough. Knead with one tbsp oil into a smooth ball.

3. Divide into 4 big balls. Spread each ball into a big round (less than 1/2 cm thin). You can cut this into desired shapes. Prick both sides of all pieces with a fork.

4. Dry out the cut out pieces on a clean kitchen towel. Repeat the same process for the other 3 balls. Dry out the pieces for 20 minutes or so on the towel like shown in the picture below.

5. Heat about 1.5 cups of oil in a kadai. (use the one you prefer for deep frying)

Dried and ready to be fried

6. You can decide if the oil is hot enough by putting a small piece of dough. If it rises to the top immediately, the oil is ready.

7. Put the cut out pieces in batches and fry till golden brown on a medium flame. Drain excess oil on kitchen tissues. Store in airtight container.

This is my entry for the Special Edition Jihva hosted by Vee of Past, Present, Me.

Note:

You can add any of your favourite spices like black pepper, sesame seeds etc. to the dough. The original recipe asked for the dough to be rolled into small puris, but I found my method more practical.

Tags:

, , , , , ,,

-----------------------------------------------

Just reminding you about Weekend Breakfast Blogging - the theme for this month is Twist in the Plate. Did you jazz up an ordinary breakfast for Diwali? Did you try your favourite blogger's recipe with your own twist? Did you turn a sweet one into a savoury one?

Come on, share it with us. You have time till 29th of this month to send me your entries. WBB turns monthly and theme-based this month onwards. Read more about it here.

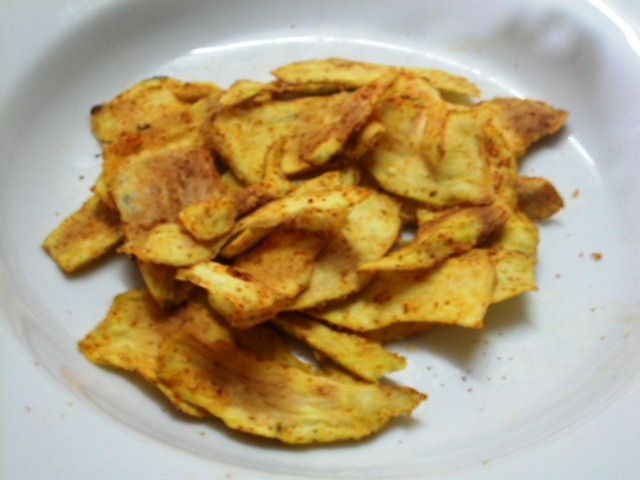
Almost fat free Sweet Potato Chips


This is more of a tip than a recipe. A tip to make chips without frying. I got this idea from the blog 28 Cooks where there was a post on Microtato Chips. The taste of my favourite brand of chips (when I was in US) was Terra - thick chips made from starchy vegetables - potatoes, sweet potatoes, beetroot etc. These were definitely deep fried, but since then I've been wanting to make sweet potato chips at home.
The Indian sweet potatoes are almost white from inside unlike the orange coloured ones I've seen in US. These are starchy and dense and hardly sweet to taste.

To make these chips, all you need is a sweet potato, some seasoning and a microwave oven. Peel the vegetable. Slice it with a mandolin or as thin as you can manage with a knife.

Spray it with some oil / Coat it evenly with a teaspoon of oil. Add salt, red chilli powder and a bit of turmeric and mix it thoroughly into the slices.

Arrange it in a single layer on a microwave safe dish, and nuke at high for 5-6 minutes. The time taken depends on the power of your machine and thickness of slices.

Cool for a while and enjoy!

You can do the same with any of the starchy vegetables.

I also tried a salt and pepper combo and that worked fine too.

Ah! The fun of eating chips without the guilt is a wonderful experience. Do try and let me know!

Almost fat free Sweet Potato Chips

Posted by admin


This is more of a tip than a recipe. A tip to make chips without frying. I got this idea from the blog 28 Cooks where there was a post on Microtato Chips. The taste of my favourite brand of chips (when I was in US) was Terra - thick chips made from starchy vegetables - potatoes, sweet potatoes, beetroot etc. These were definitely deep fried, but since then I've been wanting to make sweet potato chips at home.
The Indian sweet potatoes are almost white from inside unlike the orange coloured ones I've seen in US. These are starchy and dense and hardly sweet to taste.

To make these chips, all you need is a sweet potato, some seasoning and a microwave oven. Peel the vegetable. Slice it with a mandolin or as thin as you can manage with a knife.

Spray it with some oil / Coat it evenly with a teaspoon of oil. Add salt, red chilli powder and a bit of turmeric and mix it thoroughly into the slices.

Arrange it in a single layer on a microwave safe dish, and nuke at high for 5-6 minutes. The time taken depends on the power of your machine and thickness of slices.

Cool for a while and enjoy!

You can do the same with any of the starchy vegetables.

I also tried a salt and pepper combo and that worked fine too.

Ah! The fun of eating chips without the guilt is a wonderful experience. Do try and let me know!

Coleus aromaticus, Coleus fritterous and Coleus chapaticus

Seeing the title, you'll wonder if this is a post for Inji Pennu's Green Blog Project or is it a thesis paper on confusing little plants? Read on to find out...

I was all set to write a quick post for GBP but it wasn't to happen so. A little internet research revealed that my plant was not at all the plant I thought it was.

I started growing this plant some 6 months ago from a small sapling that was planted at home by a local plant-vendor. I was under the impression it is the Ajwain plant. You must have heard of Ajwain or Omum, which is the fragrant seed that's used in Indian cooking. Ajwain is called Bishop's weed and when i saw the pictures of this plant online, it hardly looked like the one at home.

With some more research using Marathi and Tamil names, I hit upon the actual name for this plant which is Coleus Aromaticus. It is called Karpooravalli in Tamil and Pan-Ova in Marathi. The leaves look fleshy and scaly. It grows rapidly and with ease. In started growing so much out of the pot like a mini-jungle that I had to trim it off to decent proportions a month ago. And now, it's growing into a pretty bush.

When I chopped off the excess stems and threw them away, little did I realize that I was throwing precious stuff down the drain. Apart from using crushed leaves in a Raita or Dal, i hadn't put them to any major use. A few weeks ago both my Maharashtrian friends , Ujwala and Shaila, told me that I could make fritters with these fleshy leaves and they taste out of the world.

That sounded like so much fun. As it is I was feeling terrible about not being able to grow peas, avaraikkai and tomatoes like some of my favourite bloggers, and this was a small consolation- to be able to make something from my own garden.

Some info that I've unearthed about the usefulness of this plant (ref: http://www.frlht.org.in- Encyclopedia of Indian Medicinal Plants)

NAME: All-Purpose herb, Five Seasons Herb, Mother of Herbs (Plectranthus aromaticus syn. Coleus aromaticus).


DESCRIPTION: This succulent herb has the typical four-cornered stem of the Lamiaceae family. The leaves are very thick and succulent, grey-green and hairy. The plant grows to around 50cm tall. The leaves are highly aromatic with a strong flavour of mixed herbs.

ORIGIN: Seychelles, India & South East Asia

CULTIVATION: The herb grows easily in a well-drained, semi-shaded position. It is frost tender and grows well in sub-tropical and tropical locations, but will do well in cooler climates if grown in a pot and brought indoors, or moved to a warm sheltered position in winter. Water only sparingly.

USES: The leaves are strongly flavoured and make an excellent addition to stuffings for meat and poultry. Finely chopped, they can also be used to flavour meat dishes, especially beef, lamb and game. The leaves have also had many traditional medicinal uses, especially for the treatment of coughs, sore throats and nasal congestion, but also for a range of other problems such as infections, rheumatism and flatulence. The herb is also used as a substitute for oregano in the food trade and food labelled "oregano-flavoured" may well contain this herb.


Coleus Fritterous (How exotic is that? )

Ingredients:

Freshly plucked leaves (as many fritters as you want to make)

Batter for 10-12 fritters

3 Tbsp besan (gram flour)
1 Tbsp rice flour
1/2 Tsp red chilli powder
Pinch of turmeric
Tiny pinch baking soda
Pinch of salt

Few Tbsp water to make a thick batter.
Oil for frying

Method:

Wash and pat dry leaves.
Mix all other ingredients to make batter.
Heat the oil and put the leaves covered with batter one by one into the oil. Fry on medium heat till both sides are golden brown.
Serve hot.

Taste:

These REALLY tasted out of the earth. The leaves have an oregano-ish taste, spicy and aromatic and you cant miss that taste even after deep frying. You don't need any accompaniments to this bajji- Just a cup of tea and your favourite book will do!


More:

This plant is really easy to grow and since it doesn't require heavy watering, you can also beautify your indoors with it too.


And that's something I did for fun with a little round of chapati aata that was left after making a batch of chapatis- let's call it Coleus chapaticus?


Tags: , , , , , ,


Coleus aromaticus, Coleus fritterous and Coleus chapaticus

Posted by admin

Seeing the title, you'll wonder if this is a post for Inji Pennu's Green Blog Project or is it a thesis paper on confusing little plants? Read on to find out...

I was all set to write a quick post for GBP but it wasn't to happen so. A little internet research revealed that my plant was not at all the plant I thought it was.

I started growing this plant some 6 months ago from a small sapling that was planted at home by a local plant-vendor. I was under the impression it is the Ajwain plant. You must have heard of Ajwain or Omum, which is the fragrant seed that's used in Indian cooking. Ajwain is called Bishop's weed and when i saw the pictures of this plant online, it hardly looked like the one at home.

With some more research using Marathi and Tamil names, I hit upon the actual name for this plant which is Coleus Aromaticus. It is called Karpooravalli in Tamil and Pan-Ova in Marathi. The leaves look fleshy and scaly. It grows rapidly and with ease. In started growing so much out of the pot like a mini-jungle that I had to trim it off to decent proportions a month ago. And now, it's growing into a pretty bush.

When I chopped off the excess stems and threw them away, little did I realize that I was throwing precious stuff down the drain. Apart from using crushed leaves in a Raita or Dal, i hadn't put them to any major use. A few weeks ago both my Maharashtrian friends , Ujwala and Shaila, told me that I could make fritters with these fleshy leaves and they taste out of the world.

That sounded like so much fun. As it is I was feeling terrible about not being able to grow peas, avaraikkai and tomatoes like some of my favourite bloggers, and this was a small consolation- to be able to make something from my own garden.

Some info that I've unearthed about the usefulness of this plant (ref: http://www.frlht.org.in- Encyclopedia of Indian Medicinal Plants)

NAME: All-Purpose herb, Five Seasons Herb, Mother of Herbs (Plectranthus aromaticus syn. Coleus aromaticus).


DESCRIPTION: This succulent herb has the typical four-cornered stem of the Lamiaceae family. The leaves are very thick and succulent, grey-green and hairy. The plant grows to around 50cm tall. The leaves are highly aromatic with a strong flavour of mixed herbs.

ORIGIN: Seychelles, India & South East Asia

CULTIVATION: The herb grows easily in a well-drained, semi-shaded position. It is frost tender and grows well in sub-tropical and tropical locations, but will do well in cooler climates if grown in a pot and brought indoors, or moved to a warm sheltered position in winter. Water only sparingly.

USES: The leaves are strongly flavoured and make an excellent addition to stuffings for meat and poultry. Finely chopped, they can also be used to flavour meat dishes, especially beef, lamb and game. The leaves have also had many traditional medicinal uses, especially for the treatment of coughs, sore throats and nasal congestion, but also for a range of other problems such as infections, rheumatism and flatulence. The herb is also used as a substitute for oregano in the food trade and food labelled "oregano-flavoured" may well contain this herb.


Coleus Fritterous (How exotic is that? )

Ingredients:

Freshly plucked leaves (as many fritters as you want to make)

Batter for 10-12 fritters

3 Tbsp besan (gram flour)
1 Tbsp rice flour
1/2 Tsp red chilli powder
Pinch of turmeric
Tiny pinch baking soda
Pinch of salt

Few Tbsp water to make a thick batter.
Oil for frying

Method:

Wash and pat dry leaves.
Mix all other ingredients to make batter.
Heat the oil and put the leaves covered with batter one by one into the oil. Fry on medium heat till both sides are golden brown.
Serve hot.

Taste:

These REALLY tasted out of the earth. The leaves have an oregano-ish taste, spicy and aromatic and you cant miss that taste even after deep frying. You don't need any accompaniments to this bajji- Just a cup of tea and your favourite book will do!


More:

This plant is really easy to grow and since it doesn't require heavy watering, you can also beautify your indoors with it too.


And that's something I did for fun with a little round of chapati aata that was left after making a batch of chapatis- let's call it Coleus chapaticus?


Tags: , , , , , ,


Childhood memories and a fat-free snack


It is a common notion, that more the oil more the taste, and vice versa. This is one thing that totally defies the notion. Sukha Bhel !

Bhel was the ultimate treat in school days. There used to be this bhel wala with his cart and a glass box mounted on top of the cart. He used to serve bhel puri, sev puri and pani puri like any other bhel wala. This 'bhaiyya' used to stand right opposite my balcony in Wadala, and that wouldn't make life easier for me. My grandparents wouldn't allow me to eat street food and it required many many days of excellent behaviour to convince them to let me indulge in that tangy treat.

In the glass box, there used to be stacks of fresh kurmura (puffed rice), another stack of sev, 3 steel dabbas filled with green chutney, sweet tamarind chutney and the last one with red hot spicy chutney. The walls of the box would be lined with tomatoes, boiled potatoes and in the mango season-raw mangoes. Onions and coriander, finely chopped would fill another big bowl. I would always go for the medium bhel as I wouldn't like to sweat it out with the spicy red chutney.

It was always a delight to watch him throw the puffed rice, peanuts, green and tamarind chutney, finely chopped tomatoes, onions, boiled potatoes, kairi (raw mango) and his special masala into a big vessel, swish it around and then slide it into a big paper cone. Sev, more onions, coriander, peanuts would go on the top with a final squeeze of lime and a couple of flat puris which are edible spoons. By this time, the salivary glands would be more than reasonably stimulated. All this for a sum of Rs.3.

Guys, guys, please don't make wrong calculations about my age with this. It wasn't THAT long ago, honestly! Just some 15 years ago and then inflation took it's toll. The same bhel would cost anywhere from Rs.10-30 now, depending on the area. You will find umpteen bhel puri stalls lining the beaches in Mumbai, that could be one of the reasons that the beaches here are not-so-clean.


Snack away...


Cut to present...
At home, I'd rather make a simple, healthier version of this childhood treat. It's good to keep a bag of puffed rice handy, always makes a great snack. The puffed rice at home was a few months old and had lost it's crispiness. That's why I had to dry roast it over a low flame for 5 minutes to make them crisp and fresh. If you have crisp kurmura, you can omit this.


Ingredients-
2 cups puffed rice-you can roast this with a pinch of turmeric if you like
1 onion-finely chopped
1 firm tomato-finely chopped-don't use the pulp
1 cucumber-skin removed and finely diced
1 small carrot- coarsely grated
1/4 tsp red chilli powder
1/2 tsp salt
1/4 tsp chat masala / pani puri masala
1 T finely chopped raw mango (optional)
1 T finely chopped cilantro (coriander)
Half a lime


Directions
In a big mixing bowl, add all of the last but two ingredients. Mix lightly. Remove onto serving bowls and garnish with coriander and a squeeze of lime juice. Eat IMMEDIATELY. This serves 2 people. If you want to serve after a while, keep the puffed rice in a sealed container. keep the vegetable mix aside and mix just before serving.

Notes-
-Your kids will love this, you can omit the chilli powder though
-This is one fun snack to make with your kids, you can give them all the chopped stuff and ask them to assemble
-Weight watchers- this is one of the few blessings we have. Low cal, filling, full of flavour and crunch ! Remember the more veggies you add, the lower in gets in carbs too and healthier for you too.
-You can also add well-drained boiled corn to this.


Check out:

Cate's version of bhel here

This interesting post on bhel puri by Meera here

Childhood memories and a fat-free snack

Posted by admin


It is a common notion, that more the oil more the taste, and vice versa. This is one thing that totally defies the notion. Sukha Bhel !

Bhel was the ultimate treat in school days. There used to be this bhel wala with his cart and a glass box mounted on top of the cart. He used to serve bhel puri, sev puri and pani puri like any other bhel wala. This 'bhaiyya' used to stand right opposite my balcony in Wadala, and that wouldn't make life easier for me. My grandparents wouldn't allow me to eat street food and it required many many days of excellent behaviour to convince them to let me indulge in that tangy treat.

In the glass box, there used to be stacks of fresh kurmura (puffed rice), another stack of sev, 3 steel dabbas filled with green chutney, sweet tamarind chutney and the last one with red hot spicy chutney. The walls of the box would be lined with tomatoes, boiled potatoes and in the mango season-raw mangoes. Onions and coriander, finely chopped would fill another big bowl. I would always go for the medium bhel as I wouldn't like to sweat it out with the spicy red chutney.

It was always a delight to watch him throw the puffed rice, peanuts, green and tamarind chutney, finely chopped tomatoes, onions, boiled potatoes, kairi (raw mango) and his special masala into a big vessel, swish it around and then slide it into a big paper cone. Sev, more onions, coriander, peanuts would go on the top with a final squeeze of lime and a couple of flat puris which are edible spoons. By this time, the salivary glands would be more than reasonably stimulated. All this for a sum of Rs.3.

Guys, guys, please don't make wrong calculations about my age with this. It wasn't THAT long ago, honestly! Just some 15 years ago and then inflation took it's toll. The same bhel would cost anywhere from Rs.10-30 now, depending on the area. You will find umpteen bhel puri stalls lining the beaches in Mumbai, that could be one of the reasons that the beaches here are not-so-clean.


Snack away...


Cut to present...
At home, I'd rather make a simple, healthier version of this childhood treat. It's good to keep a bag of puffed rice handy, always makes a great snack. The puffed rice at home was a few months old and had lost it's crispiness. That's why I had to dry roast it over a low flame for 5 minutes to make them crisp and fresh. If you have crisp kurmura, you can omit this.


Ingredients-
2 cups puffed rice-you can roast this with a pinch of turmeric if you like
1 onion-finely chopped
1 firm tomato-finely chopped-don't use the pulp
1 cucumber-skin removed and finely diced
1 small carrot- coarsely grated
1/4 tsp red chilli powder
1/2 tsp salt
1/4 tsp chat masala / pani puri masala
1 T finely chopped raw mango (optional)
1 T finely chopped cilantro (coriander)
Half a lime


Directions
In a big mixing bowl, add all of the last but two ingredients. Mix lightly. Remove onto serving bowls and garnish with coriander and a squeeze of lime juice. Eat IMMEDIATELY. This serves 2 people. If you want to serve after a while, keep the puffed rice in a sealed container. keep the vegetable mix aside and mix just before serving.

Notes-
-Your kids will love this, you can omit the chilli powder though
-This is one fun snack to make with your kids, you can give them all the chopped stuff and ask them to assemble
-Weight watchers- this is one of the few blessings we have. Low cal, filling, full of flavour and crunch ! Remember the more veggies you add, the lower in gets in carbs too and healthier for you too.
-You can also add well-drained boiled corn to this.


Check out:

Cate's version of bhel here

This interesting post on bhel puri by Meera here

Blogger templates. Proudly Powered by Blogger.
back to top